Showing posts with label wrap. Show all posts

Monday, 6 March 2017

UFOs finally finished

I finished two different UFOs in the last couple of days!

I am utterly delighted.

So I knew I was going to post about these two and only had a look through my blog to check what other completed project I blogged about in the last few months.  It seems that I say quite a bit about the process of sewing and ongoing projects, - but not as much about those that I finished?!

How odd is that?

I'll need to go through my completely items and blog about them soon.  Or update my blog about what project I got stuck on and why.  Plenty of material in both these categories.


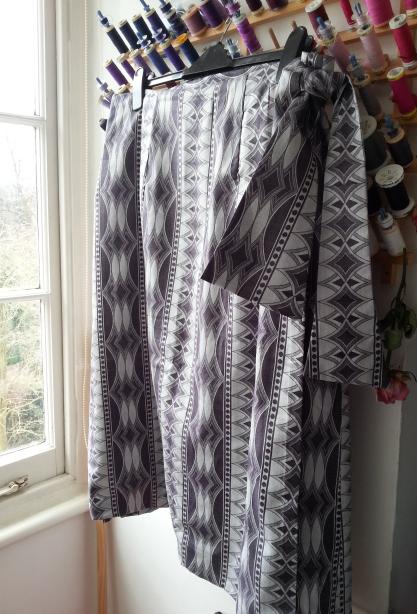
So here is my silver grey wrap skirt that took me years to get done.

The problem is that this is only the 8th project since I started sewing again after a long gap.  This was a good 5-6 years ago.  I am up to 67 projects now, so it really has been a while.

Which is probably the explanation for why I went wrong with this skirt: I thought a nice bright pink lining was a great contrast to this grey fabric, - and I do love the combination.  Unfortunatley I chose a satin like material that's much too thick for the fabric weight.  I'm not so sure that this will be good to wear.

I am really happy with the shaped ties that I came up with.  The whole skirt is self-drafted - the idea was that a wrap skirt would fit me easier even if my weight goes up and down.


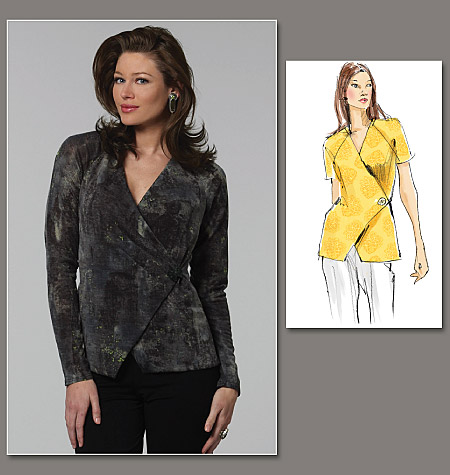
This teal coloured Lekala blouse ran into a huge problem.  The website made this look like a great standard long-sleeved blouse pattern, - except it was listed under 'stretch' fabrics?

Sorry, what?

It has bust darts, a button front and sleeve plackets and cuffs.  All hallmarks of a pattern for woven fabrics and the opposite of what you find in jersey fabric patterns.  Really odd.

Then it turns out that the fit would have been perfect if I were to put a zip in instead of buttons - there is no overlap.  I solved this by sewing a gape guard behind one of the fronts, attached buttons to this seamline and thread button loops on the edge of the other front.  Not ideal though.

Here is the graphic from the Lekala site:

It does look like a great pattern, but the lapels are very, very small.  That makes me think that the pattern was incorrectly drawn without the overlap needed.  It's easy enough to fix so I might make this again in future.  Not in a polycotton though, the sleeves wouldn't go in without puckering.

What I got stuck on was the sleeve plackets that I wanted to put in.  They turned out awful.  I must made a few mistakes cutting out the placket pieces and then couldn't overcome my revulsion at having to fix it.  It just wasn't happening and I'd rather not have this hang around for a few more years.  It's been too long and it was too difficult.  Plus I had to chop off quite a bit of the length because that looked awful on me too.

So today I chopped off the sleeves and made it into a short-sleeved blouse.  It was the quick-fix-solution that I needed.  So there.  Done.

I might now give it away to a charity shop because I am fed up with the thing.


Here's the better news:

Not a long-time UFO, this is a current sewing project that I am delighted to also have finished (SP64).  I also started another skirt, in a reddish-pink heathery wool fabric (SP67), where I only need to deal with the lining then this will be done too.

This isn't as A-line as it looks lying flat.  It is much more straight on me when I wear it - funnily enough.  I really must get someone to take a photo of me in this.

SP stands for sewing project.

So onwards and everything!

Happy sewing.


Monday, 5 December 2016

Delving into my sewing patterns: V1164

Following on from my previous post on my sewing pattern stash, I had the sudden urge to look at a Vogue pattern with interesting Dolman-style sleeves.  I am not at all convinced that these suit my figure but I wanted a look.

I didn't find it* and got a bit frustrated until I came across another pattern that I bought because it has raglan sleeves and wraps over at the front.  I thought this would make a great pattern to make up in all kinds of different fabrics.  Unfortunately I failed to see that this is for knit fabrics only.  Darn.  That's not what I was after at all.  I don't sew well with stretch fabrics.

V1164
This looks like it could be a really flattering style and I haven't made anything like this before. I won't find out what this will look like on me until I make it up and try it on.

For my muslin, I found a cheap pink stretch fabric left over from another project (that didn't turn out well, damn) and cut it out. And even sewed it up!  I am very pleased with that.

What I learnt from working with this fabric: there is absolutely no point for me to buy cheap and thin jersey fabrics: I hate working with them and they look saggy and cheap. And they don't wear well either because they wrinkle like mad.

I still have some fabrics that are almost as thin (in purple, grey and light pink) but I think they weren't as cheap and hopefully don't wrinkle as much. I'll have to check.  When I bought them I had visions of making long-sleeved T-shirt style tops as wardrobe staples. But if I don't enjoy working with them, nor like wearing them...

I should try those firmer knits instead. But then again I'd rather work with patterns for woven fabrics and erode my humungous stash of those. So there is no Ponte knit fabric shopping in my immediate future.

I did have to buy something for this project unfortunately: the front pieces of this need to be lined - to finish off the edges and to stablise them. I don't want to try a woven lining because I don't think it'll work and I had run out of stretch lining.  The pattern recommended stretch mesh or tricot. So I ordered a meter of light mesh. Who knows when I'll get that and if I'll still be in the mood for carrying on with this project.

The pink muslin showed that the style is promising: the V-neck looks good on me and I'll have to see how a slightly firmer fabric will behave in terms of fit around my middle and near the shoulders.

If I make this with short sleeves again I will want to lengthen the sleeves at the top by at least 1-1.5 inches.  I have enough fabric for long sleeves for the actual project. I just need that lining fabric first.

But even though I've run into this delay: it is really good to know that I made a start with a type of pattern I hadn't used before. That's exactly what I had in mind when I wrote the previous blog post

Brush strokes: mainly pink/purple and dark grey
Vogue 1164: View A in grey on the left has some darts near where the closure sits, View B in yellow doesn't. I tried the non-darted version in my cheap pink jersey fabric. The pattern of my project fabric would look a bit weird if darted so I will probably stick with View B (see 'Brush strokes' above).

Both views use the non-darted front pattern piece (2) for the lining.


*: I found the pattern since: it is V1239, Chado Ralph Rucci. This one:

V1239
I now think that this is also not suitable for me, because of the sleeves. Where they connect to the front and to the back is very odd: as far away from under the arm as may be possible to get. Very odd. Possibly an okay style for someone much less busty than me. So I will give this one a miss.
 
I would like to use this pattern to Frankenpattern the neckline part with another blouse pattern though (at least with rounded edges, not corners near the chin) - that line is beautiful.
 

Saturday, 30 November 2013

Pink progress


It's coming along nicely.  Look at that sheen.

The pattern is great: I like the darts shaping the shoulders as well as the lower part at the waistline that form this kind of "envelope" shape as it is referred to.

I am not so enamoured of the satin.  I pulled a thread near the bottom somewhere because a bit of rough finger nail got stuck on my precious toile.

I am just glad that this was always meant to be the toile.  It would be nice if I had the choice between them at the end (I need to get these two done by 13th December) but I will happily settle for one.

For this version I would still need to cover some buttons with this fabric and also do button holes, four of them.  This causes a great amount of anxiety in me: I am pretty terrified that I would completely mess up the whole thing if I tried to do that many button holes. Yikes.

Thinking about it: I'd rather start the bluey-green silk version and see how that goes.

Overall I have to say that it is interesting to work with this fabric and find how it works for me. Or doesn't.

I can see why designers will use satin for designs where a lot of pleats, creases and folds are shaping the design, much more so than seams and darts.  A seamline that's out by a tiny fragment of a millimeter can really affect the way the garment looks.

I don't know if I'll ever get good enough to be able to successfully work with satin.

The colour is gorgeous but it's darn difficult to cope with.


Sunday, 24 November 2013

Slippery pink stuff, blurgh


This is a rhetorical question: why did I ever think that working with slippery pink satin for my toile for the V8721 shrug was a good idea?

Oh yeah, I remember: I want this to be a wearable toile in case it works out. I'm absolutely sure that I'm not going to wear a toile made from faded, floppy sheeting but I can see myself wear something made out of this lovely pink fabric.

But oh boy, is it horrid to work with!

I had to re-cut one of the two big pieces because the lower layer of fabric slipped under the top layer.  The lesson from this is: use pins and not fabric weights on really slippery fabric - I had no idea how much a fabric like this can slide around while you're busy cutting it out.

And in case of any doubt: use at least twice the amount of pins you think you'll need!  If not more...

Horrid stuff.

But such a lovely colour!  And the sheen!

I might sing a different tune once I get this done, but for now I'm just not looking forward to the sewing part.  I can't help myself: I feel a headache coming on!


I bought this great book on garment construction.  The Fashion and Textile Museum in Bermondsey are selling an interesting collection of fashion design and pattern books.  I already own a few they sell so I didn't think I would be spending money when I went on Saturday.  Then I leafed through this one.  Must investigate further but it looks really good.  And useful!

We saw this exhibition at the FTM:


It was wonderful.  Very inspiring.
 
The first room, the Royal Room, was reserved for clothes made for and worn by royalty, in particular Princess Diana.  I was surprised to the see the apricot coloured Going Away dress she wore after her wedding.  I didn't like it very much, the chiffony bits were a bit much.
 
But right next to it was an aubergine evening gown that's utterly gorgeous! It had a very interesting folded and wound 'thing' going on at the bodice/neckline area.  I would have loved to see this better but the light was kept dimmed to protect the clothes.  Quite rightly.  This gown was my favourite in the room.
 
It was nice to see the sketches and then the dresses IRL.  Intriguing.
 
We were able to take pictures of the rest of the exhibit.  There were quite a few dresses in a very romantic vein - not really my cup of tea.  Some of the construction or embellishment techniques were interesting.  My favourites were the satin dresses that had pleating and folding: such wonderful shapes!
 
I was very intrigued by some of the seam lines on other dresses.  I must do a separate post on all those.
 
Loved it.

Friday, 23 March 2012

Rebecca Wrap Update

A quick update on how far I got with the wrap top from the Rebecca magazine.

I had motored through the back at such speed, I was quite sure that this would be a quick project!  I just love knitting this even though the needles are tiny and the yarn pretty darn thin.  I just love it: the stitches seem to firmly flow off the needles.  I think it may have to do with the yumminess of the JC Rennie lambswool - it feels very nice on your hands as you knit.  I'm sure you could take it double and get through it much quicker, but hey.

There is a bit of a hold-up on this.  I have already blogged about the three sleeves I produced to make sure they're both the same - these two are still at the same stage: just at the point where the side seams go into the armhole seams.  I need to see what shape my back and front pieces are before I continue.

It is the front piece that's giving me the most trouble.

I am on version 2.  I had to rip one of them down quite a bit too, so this is really version 2.5, or higher!

The problem is that my yarn and therefore gauge is so very different to the pattern instructions.  I also seem to be quite a different shape to the young, svelte slip of a girl model in the magazine - that might have even more to do with it!

The front piece is knit from the top down: you start making the two shoulder pieces and then join them together with newly cast-on stitches for the bottom of the neckline.  Then it should be full steam ahead in more stocking stitch until you start to introduce the ribbing from both sides - slanting inwards so the ribbing meets in the centre a bit further down.  The ribbing does not just run in one direction - there are increases alongside what would be a seamline on a sewn dress: this should run across the bust point and then straight down.

This is not what was happening with my first version.  The ribbing and the 'seamline' unfortunately didn't hit the right spots but ran down the sides of my boobs, rather emphasising them in the process.  This is completely the opposite effect of what you would ever want to achieve!  It just looked really horrid and dilettante.

So I ripped and re-knit.  I started the ribbing higher up and introduced the line of increases further in towards the middle.  This adjustment made it necessary to make a further change.  Either side of that 'seamline' the instructions called for one portion of the ribbing (the outer one) to run downwards in parallel ribs and all the increases to occur on the inner side where increasingly more ribs would run down at a slant -if that makes sense.

Exactly that wasn't working for me - so I switched it round.  Unfortunetely that in turn means (it never ends, does it!) that the ribbing wouldn't look right once the seamline reached the bust point, the slanted line would carry on slanted whereas I wanted it to run straight down.  So I reversed direction: now the increases occur on the outer ribbing side of the 'seamline'.

And do you know what?  I think it works!


I was really nervous that all these changes wouldn't work out.  I am still not completely convinced that this top will work as it should, but I can't see any obvious error so I'm still keeping my fingers crossed.

I got to the stage where the ribbing meets in the middle.  I did another slight adjustment here by twisting the central two ribs (like a cable) for further interest.  I like it!

Then shortly below this point the front piece is split into two halves.  I am chosing to knit both at the same time on one needle with obviously two balls of yarn.  I like circular needles but you could use straight needles just as well.  I knit two rows on the right half and then two on the left half - this way I can increase in the same places and I did end up with the same number of stitches for both without having to put in lots of effort of counting and checking.  Much easier!

I also decided that I would gradually increase the ribbing further at the side seams - stocking stitch and ribbing obviously gives you quite different widths.  I don't want the ribbing to flatten out too much because I don't think this will look good.  But because ribbing pulls the material together quite a bit more I need more stitches and that's the reason why I decided on increases at the side seams.  It might look a bit odd.
Like I said: I am not at all convinced that all these adjustments will result in a good look.  It might come out rather strange looking.  On the other hand: I will have learnt a lot about shaping and what things look like when you use ribbing.  That's a new learning experience.
I can't say that the top will look terribly similar to the photo in the magazine though... Story of my life.

I got to the point where I need to cast off some stitches for the bottom hem of the front.  I am a little unsure how many - the remaining stitches will continue on into long ties to wrap round for a knot at the back.  I think that I need to cast off more than the outer ribbing stitches, that will look a bit odd but it would be worse if I tried to make the ties too wide.  They are bound to bunch up at the hem and that would draw attention to my tummy.  Again a look I am exceedingly keen to avoid!

Once I decide how much to cast off it will be a case of some anxiety until I can see how it works and what it will look like!  It's all very exciting but also induces some nail-biting!

I guess I like challenges, this sure is one.

Saturday, 21 January 2012

Life lessons in knitting matters

Two's company, three's a crowd

Guess what this is! Yes indeed, it is three sleeves (for my wrap top from the Rebecca magazine).

How did that happen?  Well, here's where the lessons in knitting come in:

Once you knit sleeve number 1 with specific needles, then do go ahead and knit sleeve number 2 with the exact self same needles!  It will save time and effort.  It will!

This is because:

  1. Even though short DPNs and long DPNs say that they are the same size does not mean they are
  2. Putting both needles through a needle gauge at the same size don't mean nuthin.
  3. When you find that one sleeve is way bigger than the other on the self same number of stitches: stop and think
  4. Instead of ripping back to the cuff and re-knitting the whole lot with less stitches: do check the cuff size against each other too.  This might just be a really good idea!
  5. Yes: when a sleeve is a different size with the same number of stitches as another sleeve, then the cuff with the same number of stitches as the other cuff is also a different size!
  6. And no: do not think that it'll be all right because a different number of stitches does indeed mean that you get a different result, only imagine!  What a surprise.
  7. And with all of the above having been said: do check the actual fabric you're getting by comparing what it feels like when you actually touch both sleeves!  You know: rub them a bit between your fingers - do the tactile thing.  Yes: the fabric you get with less stitches is lots thinner and even awfully more floppy than the fabric you get with more stitches!  D'uh!!

Longer DPNs on the left, shorter DPNs on the right

Yikes!

How could I?  I just kept on knitting, thinking: I am getting the same size now that I'm not increasing, I am, aren't I?  Surely it'll be all right?

Nooooo! It won't!!!  Don't be so daft.

I realised that I was getting knitted fabric where the stitches felt more 'spaced' out for want of a better word, and still: I kept on going!  I just don't believe myself.

Now, I am not convinced that those two kinds of needles really are slightly different in size - they are both supposed to be 2.5mm and seeing as the needle gauge also says they're 2.5mm I do tend to believe that they are.

But very obviously I am getting different results and the lesson has sunk in now: if you use short DPNs the first time round, then for God's sake: use the blasted things for the second sleeve as well!  What was I thinking?  Oh yeah: longer DPNs will mean that the stitches won't slip off the needles as easily as happened on the first sleeve.

Instead it might be a good idea to just use more of those shorter DPNs, I do have them after all (I like knitting two socks at the same time so I have two sets of most size sock needles). I wonder if the problem lies in stitches spacing out a bit more on longer needles?  Or the longer ones are indeed just a touch bigger?  At this thinness it could make a difference.  Regardless: I won't be making this mistake again.  I hope.

This is particularly galling because the front piece did not work out yet either.  I will blog this separately but I will have to rip this down quite a bit, or best yet like here: start over and keep comparing to the first version so I don't repeat my errors.

I am lucky that I have a tailor dummy in my measurements so I can pin a piece to it to check for fit.  No use for sleeves, but at least the re-doing of the front won't be a huge pain.

Having motored through the back in three days flat (including blocking! Wahey!) did set me up to think that this knit would be an absolute breeze.  Famous last words!