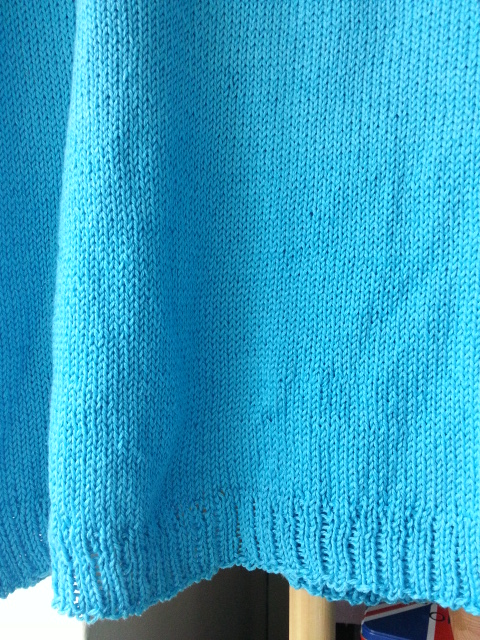
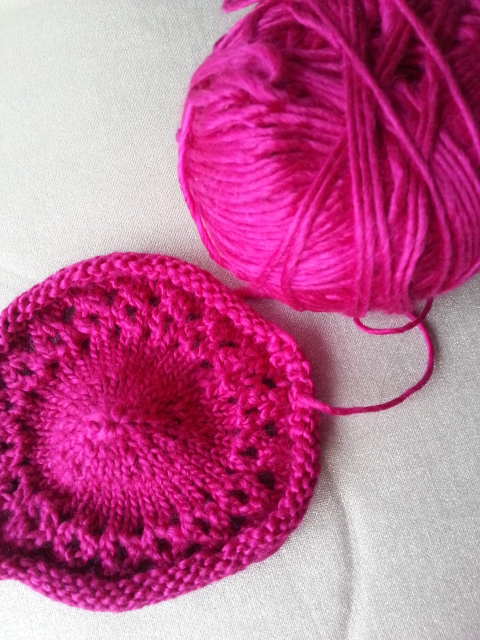
I finished two different UFOs in the last couple of days!
I am utterly delighted.
So I knew I was going to post about these two and only had a look through my blog to check what other completed project I blogged about in the last few months. It seems that I say quite a bit about the process of sewing and ongoing projects, - but not as much about those that I finished?!
How odd is that?
I'll need to go through my completely items and blog about them soon. Or update my blog about what project I got stuck on and why. Plenty of material in both these categories.
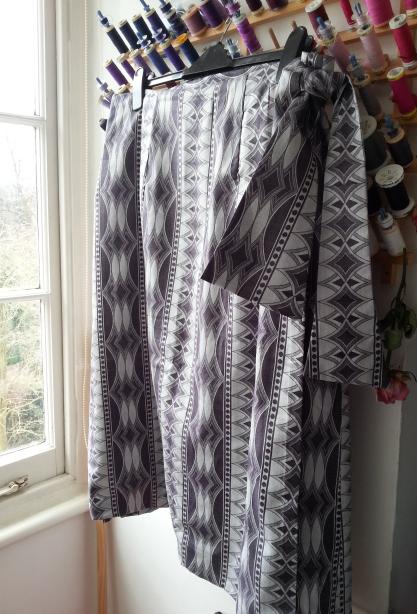
So here is my silver grey wrap skirt that took me years to get done.
The problem is that this is only the 8th project since I started sewing again after a long gap. This was a good 5-6 years ago. I am up to 67 projects now, so it really has been a while.
Which is probably the explanation for why I went wrong with this skirt: I thought a nice bright pink lining was a great contrast to this grey fabric, - and I do love the combination. Unfortunatley I chose a satin like material that's much too thick for the fabric weight. I'm not so sure that this will be good to wear.
I am really happy with the shaped ties that I came up with. The whole skirt is self-drafted - the idea was that a wrap skirt would fit me easier even if my weight goes up and down.
This teal coloured Lekala blouse ran into a huge problem. The website made this look like a great standard long-sleeved blouse pattern, - except it was listed under 'stretch' fabrics?
Sorry, what?
It has bust darts, a button front and sleeve plackets and cuffs. All hallmarks of a pattern for woven fabrics and the opposite of what you find in jersey fabric patterns. Really odd.
Then it turns out that the fit would have been perfect if I were to put a zip in instead of buttons - there is no overlap. I solved this by sewing a gape guard behind one of the fronts, attached buttons to this seamline and thread button loops on the edge of the other front. Not ideal though.
Here is the graphic from the Lekala site:
It does look like a great pattern, but the lapels are very, very small. That makes me think that the pattern was incorrectly drawn without the overlap needed. It's easy enough to fix so I might make this again in future. Not in a polycotton though, the sleeves wouldn't go in without puckering.
What I got stuck on was the sleeve plackets that I wanted to put in. They turned out awful. I must made a few mistakes cutting out the placket pieces and then couldn't overcome my revulsion at having to fix it. It just wasn't happening and I'd rather not have this hang around for a few more years. It's been too long and it was too difficult. Plus I had to chop off quite a bit of the length because that looked awful on me too.
So today I chopped off the sleeves and made it into a short-sleeved blouse. It was the quick-fix-solution that I needed. So there. Done.
I might now give it away to a charity shop because I am fed up with the thing.
Here's the better news:
Not a long-time UFO, this is a current sewing project that I am delighted to also have finished (SP64). I also started another skirt, in a reddish-pink heathery wool fabric (SP67), where I only need to deal with the lining then this will be done too.
This isn't as A-line as it looks lying flat. It is much more straight on me when I wear it - funnily enough. I really must get someone to take a photo of me in this.
SP stands for sewing project.
So onwards and everything!
Happy sewing.
Showing posts with label problem. Show all posts
Monday, 6 March 2017
Thursday, 2 February 2017
A pretty crochet border
...or how good it feels to complete a long-time UFO. Damn good!
I started this project, a nice, cool summer top, so many years ago that I don't remember when. Judging from intervening house moves it was at least three years ago, but could be longer.
It is finished!!! Ta-da!
I am so pleased. The feeling of satisfaction at completing something that was cluttering up my space: it is a priceless, unbeatable feeling. To no longer come across it and having to think: "Oh yeah, I need to finish that at some point, soon, whenver...". Such a relief!
I do have waaaaaaaaaaaaaaayyyy too many unfinished projects hanging around like a bad smell. Triggering uncomfortable, opppressive vibes.
I want to no longer contribute to even more of them. It has to stop: either complete it, throw it out or do something (whatever it is) with it. Give to friends, to a charity shop, rip it back down if it's knitted, throw it in a clothes collection bin for making blankets out of or whatever they do...
I don't intend on exposing myself to the disheartening pressure of wanting to go through everything I have lying around and get this fixed right this minute, if not yesterday - I will take my time over it. I am able to do this on a gradual basis, I don't have to stress myself out. I will look at a few projects at a time, both knitting and sewing or quilting projects, and decide on which one 'grabs' me the most. I like using spontaneous urges that have me pick up one specific thing - it usually means that I successfully deal with it.
As I mentioned, my sewing group is having a two-part sewalong on looking over UFOs, one was in January, the next one Part 2 is in March. This proved extremely beneficial: I got the urge to look at just this or that UFO, and had started to do a little sewing here and there too.
Then I came across some of my knit UFO projects that are too numerous to mention - this is just the first one I was able to do something with. I had absolutely no idea how I was going to deal with a gaping big neckline, the thought of knit ribbing was a bit offputting.
Seeing how pretty this crochet border looks, I am extremely glad that I looked for something else. I do save a lot of photos I find inspiring. One of them was of a page in a Japanese book, an edging there inspired the top half of my border. I improvised the other part at the bottom:
I put down a foundation row of double crochet stitches.
I was able to go 'around' the corners by not crocheting into every stitch. The top part of the pattern then also missed out a stitch here and there to make it lie flat.
Same at the back. You can also see that my "seam line" between sleeve and body looks a little odd. I used the seamless method* by decreasing at this point in every second row. The kink in the line comes from switching from decreasing in the body area to decreasing at the sleevehead.
This method is probably a bit better for fibres that are smoother and will pull into place a bit better than this cotton yarn.
I made the ribbing in a K2 P1 pattern.
This photo shows the problem of the neckline very well: not only is it too big, the fabric also rolls in as well as out in several places. This would have never looked good or felt comfortable if left like this - I was really unsure what to do with it for a long time.
I can also see now that I could have decreased between sleeve and body a little more further down. You live and you learn!
Overall I am content but not ecstatic with how the top looks on me. I am utterly delighted in an over-the-moon way that I finished it!
Yay me.
Now where is that other WIP where I need to do my magic with the squashed sleeveheads? Lemme at it!
PS: The seamless sweater method* has been explained by Elizabeth Zimmermann in at least one of her books, and also by Tuulia who developed a pattern that you can buy.
I started this project, a nice, cool summer top, so many years ago that I don't remember when. Judging from intervening house moves it was at least three years ago, but could be longer.
It is finished!!! Ta-da!
I am so pleased. The feeling of satisfaction at completing something that was cluttering up my space: it is a priceless, unbeatable feeling. To no longer come across it and having to think: "Oh yeah, I need to finish that at some point, soon, whenver...". Such a relief!
I do have waaaaaaaaaaaaaaayyyy too many unfinished projects hanging around like a bad smell. Triggering uncomfortable, opppressive vibes.
I want to no longer contribute to even more of them. It has to stop: either complete it, throw it out or do something (whatever it is) with it. Give to friends, to a charity shop, rip it back down if it's knitted, throw it in a clothes collection bin for making blankets out of or whatever they do...
I don't intend on exposing myself to the disheartening pressure of wanting to go through everything I have lying around and get this fixed right this minute, if not yesterday - I will take my time over it. I am able to do this on a gradual basis, I don't have to stress myself out. I will look at a few projects at a time, both knitting and sewing or quilting projects, and decide on which one 'grabs' me the most. I like using spontaneous urges that have me pick up one specific thing - it usually means that I successfully deal with it.
As I mentioned, my sewing group is having a two-part sewalong on looking over UFOs, one was in January, the next one Part 2 is in March. This proved extremely beneficial: I got the urge to look at just this or that UFO, and had started to do a little sewing here and there too.
Then I came across some of my knit UFO projects that are too numerous to mention - this is just the first one I was able to do something with. I had absolutely no idea how I was going to deal with a gaping big neckline, the thought of knit ribbing was a bit offputting.
Seeing how pretty this crochet border looks, I am extremely glad that I looked for something else. I do save a lot of photos I find inspiring. One of them was of a page in a Japanese book, an edging there inspired the top half of my border. I improvised the other part at the bottom:
I put down a foundation row of double crochet stitches.
I was able to go 'around' the corners by not crocheting into every stitch. The top part of the pattern then also missed out a stitch here and there to make it lie flat.
Same at the back. You can also see that my "seam line" between sleeve and body looks a little odd. I used the seamless method* by decreasing at this point in every second row. The kink in the line comes from switching from decreasing in the body area to decreasing at the sleevehead.
This method is probably a bit better for fibres that are smoother and will pull into place a bit better than this cotton yarn.
I made the ribbing in a K2 P1 pattern.
This photo shows the problem of the neckline very well: not only is it too big, the fabric also rolls in as well as out in several places. This would have never looked good or felt comfortable if left like this - I was really unsure what to do with it for a long time.
I can also see now that I could have decreased between sleeve and body a little more further down. You live and you learn!
Overall I am content but not ecstatic with how the top looks on me. I am utterly delighted in an over-the-moon way that I finished it!
Yay me.
Now where is that other WIP where I need to do my magic with the squashed sleeveheads? Lemme at it!
PS: The seamless sweater method* has been explained by Elizabeth Zimmermann in at least one of her books, and also by Tuulia who developed a pattern that you can buy.
Friday, 27 January 2017
Another thought on why I build up a stash
I am using some stash fabric in making a new quilt, that is the patchwork for its top. I don't intend to get this done any time soon, I just wanted to see what the blocks look like.
I saw this intriguing tutorial about sewing four strips together and cutting four triangles from each square. It does make a lovely pattern:
The busy looking navy is a cheap fabric I got from a Shephard's Bush shop several years ago for the purpose of mixing it with other navy fabrics for quilts. The assembly of this pattern was intriguing, I wanted to see for myself how this would turn out. I literally started without a plan. Can always make a baby quilt, right?
So of course I like this so much that I would love to make this into a big quilt and of course I am running out of these fabrics! That was kind of obvious, wasn'n it? I like this patterned blue fabric so much that I want to run back to Shephard's Bush to check if there's more and then buy loads!
I think I may have had another insight on why I build up a stash and then have huge trouble to dip into it and use stuff up: when I sew with a fabric like this one, that I had been looking forward to using, only I had no idea on what yet...
...it means that I need to let go of something that seemed to have a lot of promise. I could maybe even make a top with it if the mood strikes! I'll make lovely quilts! I'll do this, I'll do that!
I am finding it so hard to use stash material because I might 'waste' it on something that won't look great (like it does in my head when I think about the potential) - it's like some fabrics are my favourites and it feels painful to see them graduate (to become part of a project), grow up (move from 'possibility' to 'actually being used') and then leave home (i.e. leave my stash).
I bought a great FQ once at Alexandra Palace (I used some of it for my Steampunk vibe skirt) - the seller said something like she was letting one of her kids go: because it was the last one of this pattern, and that she knows all her fat quarters so well that it feels like a loss when she sells some of them.
I finally know what she meant because I am experiencing it, just by putting the darn thing to the use it is intended for. I had some fabrics so long, they feel like part of the family now! Ach...
I really need to get over this. If I want to keep admiring fabrics then I should hang them on the wall like it's artwork. But I can't just keep them around in case I want to pull something out and sigh over it! I mean, come on!? That's beyond silly.
The issue with this specific fabric is also that it felt like a very versatile fabric: the pattern can be mixed with anything: similar navy shades or contrast colours. I feel a bit desolate that I narrowed it down to this one choice, and therefore it is 'versatile' no longer.
So looking at the whole thing from another angle: does that mean that most of my fabrics are not versatile enough to be easily applied to a pattern? Did I buy a lot of fabrics only because I liked them but they may be too difficult to use? Is that another reason why I have so much stash?
I do find that it can be really difficult to try and find a suitable fabric when I want to start a project. I often wish I could go and buy new so I get to pick weight, colour, pattern and fibre in special dedication to the particular item. But when I did try and buy new for e.g. my waterfall collar jacket [I'll insert a link once I do post about it] I couldn't find a single thing I really liked - "making do" with something from my stash did then let me go ahead and start.
I may have to let some of my old fabrics go. To lighten the load. Or start with a fabric and decide on a project, that might work better. Oh crikey...
Sneak peak of the waterfall jacket (it needs a lot of fitting and adjustment work):
I saw this intriguing tutorial about sewing four strips together and cutting four triangles from each square. It does make a lovely pattern:
The busy looking navy is a cheap fabric I got from a Shephard's Bush shop several years ago for the purpose of mixing it with other navy fabrics for quilts. The assembly of this pattern was intriguing, I wanted to see for myself how this would turn out. I literally started without a plan. Can always make a baby quilt, right?
So of course I like this so much that I would love to make this into a big quilt and of course I am running out of these fabrics! That was kind of obvious, wasn'n it? I like this patterned blue fabric so much that I want to run back to Shephard's Bush to check if there's more and then buy loads!
I think I may have had another insight on why I build up a stash and then have huge trouble to dip into it and use stuff up: when I sew with a fabric like this one, that I had been looking forward to using, only I had no idea on what yet...
...it means that I need to let go of something that seemed to have a lot of promise. I could maybe even make a top with it if the mood strikes! I'll make lovely quilts! I'll do this, I'll do that!
I am finding it so hard to use stash material because I might 'waste' it on something that won't look great (like it does in my head when I think about the potential) - it's like some fabrics are my favourites and it feels painful to see them graduate (to become part of a project), grow up (move from 'possibility' to 'actually being used') and then leave home (i.e. leave my stash).
I bought a great FQ once at Alexandra Palace (I used some of it for my Steampunk vibe skirt) - the seller said something like she was letting one of her kids go: because it was the last one of this pattern, and that she knows all her fat quarters so well that it feels like a loss when she sells some of them.
I finally know what she meant because I am experiencing it, just by putting the darn thing to the use it is intended for. I had some fabrics so long, they feel like part of the family now! Ach...
I really need to get over this. If I want to keep admiring fabrics then I should hang them on the wall like it's artwork. But I can't just keep them around in case I want to pull something out and sigh over it! I mean, come on!? That's beyond silly.
The issue with this specific fabric is also that it felt like a very versatile fabric: the pattern can be mixed with anything: similar navy shades or contrast colours. I feel a bit desolate that I narrowed it down to this one choice, and therefore it is 'versatile' no longer.
So looking at the whole thing from another angle: does that mean that most of my fabrics are not versatile enough to be easily applied to a pattern? Did I buy a lot of fabrics only because I liked them but they may be too difficult to use? Is that another reason why I have so much stash?
I do find that it can be really difficult to try and find a suitable fabric when I want to start a project. I often wish I could go and buy new so I get to pick weight, colour, pattern and fibre in special dedication to the particular item. But when I did try and buy new for e.g. my waterfall collar jacket [I'll insert a link once I do post about it] I couldn't find a single thing I really liked - "making do" with something from my stash did then let me go ahead and start.
I may have to let some of my old fabrics go. To lighten the load. Or start with a fabric and decide on a project, that might work better. Oh crikey...
Sneak peak of the waterfall jacket (it needs a lot of fitting and adjustment work):
Friday, 13 January 2017
UFO progress!
I am delighted. I was able to pick up The White Jacket again which had been a most aggravating unfinished object for several years. I started numbering my projects when I began to seriously sew again a few years back. This is project number S9! That's how long ago this is.
This is how far I got today after some pressing and general fiddling about:
The photo below showed (half of) the stage I was at which gave me so much trouble. I had followed the pattern quite faithfully and found that the shoulders are much too wide on me. I thought it was going to be such a long-winded and time-consuming endeavour to unpick the sleeveheads and move them inwards by a good centimeter.
Until I started the first one. I took the shoulder on the left in and the right shoulder is the 'before' picture. Isn't that a huge difference? The sleeve just dips off the shoulder on the right and makes the jacket look very home made. That one centimeter (or so) pulls the whole jacket off whack.
I literally cannot believe how little time it took to remedy the situation. That should be a lesson to me to stop putting things off for so very long!
I had such a tough time trying to decide what contrast material to use. None of the lace I either had or looked to buy was right. Then I considered various ribbons and braids, some of these I bought (see the photo above), I just couldn't get all that enthusiastic about any of them.
I think I wanted a lace very close to that on the pattern envelope (how unimaginative is that?) but couldn't find it.
Encouraged by our upcoming UFO planning sewalong I was thinking about the whole project early in the morning when I had lots of time and no pressure to be anywhere. It's very freeing: you know that you don't have to jump up and act on any sewing decision then and there, and it's just a lovely, relaxing time to think things through.
Not for the first time, this turned out to be a very useful exercise for me. I visualised the steps I would carry out to get the lapels looking the way I want: to cut the lower layer smaller than the upper so the stitching line would not show up. Same thing for attaching the lapels to the front side seams: I would need to pay attention to the turn of cloth space needed and it all felt like a lot of fiddling around.
Plus I hadn't even washed my sample with the ribbon sewn on! I would have been extremely annoyed with myself if any of the black colour had come off onto the lovely white jacket if I hadn't washed it.
So I finally had a very clear thought: I have masses of sewing projects that I started, it will feel incredibly good to get some of them completed and I have to admit to myself that I will not be able to finish this jacket any time soon if I have to faff about with it for much longer. Plus: how much do I like these lapels when I think about the bother of getting them done?
Answer: not all that much.
So leave them off. What a relief! It was the best decision I could have made. If I do ever want a jacket that has lapel lace overlays then I can start another project as soon as I have a lace I want to use. And then maybe I won't use this odd pattern that has lapels as separate pieces.
I might write about this element of the pattern another time because it seems odd to me for lapels to be separate to the front jacket pieces. The whole stitching technique described in the instructions doesn't feel very promising - there is a lot that could go wrong. But as I said I might write about this another time and can then include a photo of the instructions that make it clearer what they are asking for.
In danger of this post becoming too long yet again. I can't help myself, I just attached straps to a tote bag that is taking much, much longer than I had hoped. Here it is:
I "just" need to add lining to the inside so the black bottom doesn't catch too much dust and debris. The corner seams would just be dust traps.
This is how far I got today after some pressing and general fiddling about:
![]() |
| I 'only' need to do body and sleeve hems now |
The photo below showed (half of) the stage I was at which gave me so much trouble. I had followed the pattern quite faithfully and found that the shoulders are much too wide on me. I thought it was going to be such a long-winded and time-consuming endeavour to unpick the sleeveheads and move them inwards by a good centimeter.
Until I started the first one. I took the shoulder on the left in and the right shoulder is the 'before' picture. Isn't that a huge difference? The sleeve just dips off the shoulder on the right and makes the jacket look very home made. That one centimeter (or so) pulls the whole jacket off whack.
I literally cannot believe how little time it took to remedy the situation. That should be a lesson to me to stop putting things off for so very long!
I had some other concerns that caused the delay. The jacket was supposed to have a lovely contrast material overlay of lace or similar on the lapels. See pattern:
I had decided against the mock pocket opening fairly early on - I didn't think that they would look good on my bigger figure and wouldn't add that much anyway.
But I was quite keen on those lapels. They are the reason why I picked this pattern. Even though I didn't want to include the other design feature (those black pocket borders) and also lengthened the sleeves. These three quarter sleeves just look odd to me.
I had such a tough time trying to decide what contrast material to use. None of the lace I either had or looked to buy was right. Then I considered various ribbons and braids, some of these I bought (see the photo above), I just couldn't get all that enthusiastic about any of them.
I think I wanted a lace very close to that on the pattern envelope (how unimaginative is that?) but couldn't find it.
Encouraged by our upcoming UFO planning sewalong I was thinking about the whole project early in the morning when I had lots of time and no pressure to be anywhere. It's very freeing: you know that you don't have to jump up and act on any sewing decision then and there, and it's just a lovely, relaxing time to think things through.
Not for the first time, this turned out to be a very useful exercise for me. I visualised the steps I would carry out to get the lapels looking the way I want: to cut the lower layer smaller than the upper so the stitching line would not show up. Same thing for attaching the lapels to the front side seams: I would need to pay attention to the turn of cloth space needed and it all felt like a lot of fiddling around.
Plus I hadn't even washed my sample with the ribbon sewn on! I would have been extremely annoyed with myself if any of the black colour had come off onto the lovely white jacket if I hadn't washed it.
So I finally had a very clear thought: I have masses of sewing projects that I started, it will feel incredibly good to get some of them completed and I have to admit to myself that I will not be able to finish this jacket any time soon if I have to faff about with it for much longer. Plus: how much do I like these lapels when I think about the bother of getting them done?
Answer: not all that much.
So leave them off. What a relief! It was the best decision I could have made. If I do ever want a jacket that has lapel lace overlays then I can start another project as soon as I have a lace I want to use. And then maybe I won't use this odd pattern that has lapels as separate pieces.
I might write about this element of the pattern another time because it seems odd to me for lapels to be separate to the front jacket pieces. The whole stitching technique described in the instructions doesn't feel very promising - there is a lot that could go wrong. But as I said I might write about this another time and can then include a photo of the instructions that make it clearer what they are asking for.
In danger of this post becoming too long yet again. I can't help myself, I just attached straps to a tote bag that is taking much, much longer than I had hoped. Here it is:
I "just" need to add lining to the inside so the black bottom doesn't catch too much dust and debris. The corner seams would just be dust traps.
Tuesday, 10 January 2017
What about this UFO?
Do you want to join a virtual sew-along? (January 2017)
I am planning a virtual "Sew-along" with my sewing group: look over unfinished objects (UFOs), otherwise known as WIPs (Works in Progress) - and consider whether to chuck, alter or finish.


And oh boy! Do I have a lot of material to work with on this one! It's downright embarrassing to be honest.
I already posted about a couple of projects on the group's website (meetup.com - London Dressmakers). I've since remembered a lot more, or found them when I looked through a basket I've long left alone. Oh my word, it's horrifying.
I would start projects, run into some kind of issue with it (or maybe just get bored?), decide that I'd work on it again when I am in the right 'head space'... forget all about it... Pick it back up for a look and then promptly lay it aside again.
That's what I kept doing. Did I mention it's horrifying?
I desperately need this virtual event to motivate myself into looking into the recesses harbouring long forgotten items that I probably don't even want to think of again. I don't know if I find it reassuring that one of the sewalong's options is to chuck anything that I don't want to carry on with? Or does the thought make me feel anxious: I would also be throwing away my hopes and dreams and aspirations wrapped up in that never realised item?
I need to get over that, I cannot just let things lie around and become oppressive, I really can't. That's not good for your soul, let alone your sewing mojo.
I must say though that I started to think about some sewing WIPs in the morning before I need to go and do anything else: I think through what my next step on a project is or if there is some kind of difficulty. Because I know that I don't have to get up and tackle that challenge right then and there, my early morning thinking time is quite pleasant and more productive: no pressure.
I have actually had an idea or two of how to tackle a UFO that may even help, we'll see (this is about the White Jacket, which I have now posted about).
For now I will identify those projects that I want to include in our sewalong (I can't do them all) and maybe plan a couple more blog posts around them. I already blogged about my tunic with the clever pockets.
Do you want to join in virtually? (Time of writing: Jan 2017) Click through and describe your UFO/s in the comments and let us know what your thoughts are about it - the sewalong is on for two weeks, and can easily be extended. There is a photo album to post pictures (close-up shots of details are particularly useful). If you need advice then the others might be able to come up with something, so use the comments to ask!
It'll be fascinating to see if we can get some of those old projects kick-started again. Happy thinking, planning and sewing!
I am planning a virtual "Sew-along" with my sewing group: look over unfinished objects (UFOs), otherwise known as WIPs (Works in Progress) - and consider whether to chuck, alter or finish.


And oh boy! Do I have a lot of material to work with on this one! It's downright embarrassing to be honest.
I already posted about a couple of projects on the group's website (meetup.com - London Dressmakers). I've since remembered a lot more, or found them when I looked through a basket I've long left alone. Oh my word, it's horrifying.
I would start projects, run into some kind of issue with it (or maybe just get bored?), decide that I'd work on it again when I am in the right 'head space'... forget all about it... Pick it back up for a look and then promptly lay it aside again.
That's what I kept doing. Did I mention it's horrifying?
I need to get over that, I cannot just let things lie around and become oppressive, I really can't. That's not good for your soul, let alone your sewing mojo.
I must say though that I started to think about some sewing WIPs in the morning before I need to go and do anything else: I think through what my next step on a project is or if there is some kind of difficulty. Because I know that I don't have to get up and tackle that challenge right then and there, my early morning thinking time is quite pleasant and more productive: no pressure.
I have actually had an idea or two of how to tackle a UFO that may even help, we'll see (this is about the White Jacket, which I have now posted about).
For now I will identify those projects that I want to include in our sewalong (I can't do them all) and maybe plan a couple more blog posts around them. I already blogged about my tunic with the clever pockets.
Do you want to join in virtually? (Time of writing: Jan 2017) Click through and describe your UFO/s in the comments and let us know what your thoughts are about it - the sewalong is on for two weeks, and can easily be extended. There is a photo album to post pictures (close-up shots of details are particularly useful). If you need advice then the others might be able to come up with something, so use the comments to ask!
It'll be fascinating to see if we can get some of those old projects kick-started again. Happy thinking, planning and sewing!
Labels:
adjustments,
idea,
inspiration,
modification,
plans,
problem,
progress,
project plan,
sew-along,
sewing,
WIP
Friday, 6 January 2017
Project massive blouse 6 January 2017
Even more progress. I closed most seams though I feel a bit weird
saying this, surely these aren't all the seams just yet? I'll have to
check but I do think so.
More photos:
I "just" need to do the buttonholes and sew on buttons. Once I know what buttons I want to use. On the other hand I don't have a lot of sewing thread left, do I perhaps want some kind of snap or other closure instead? I'll need to think that over a bit first.
The other thing I'll have to do before thinking about the proper project is to get photos of me wearing this. I'll be able to tell how much shorter I want the white blouse to be.
I have the white fabric right here to use but I'm reluctant to jump into carrying on. I feel that I need to take a little time to consider how I want the white blouse to be. The sleeves do drag a bit funny and seem to twist a little, luckily they are about the right length. The cuffs fold back on top of them instead of lengthening the sleeves as I thought, but they're still a good length on me.
The cuved baby hems turned out really well, I'm happy I did them. I also really enjoy how much I could practice my 'accurate' sewing. Looking quite good in most places!
The standing up collar seems a bit tall - it comes up too high and that make me feel a bit 'wedged in', like the collar is some kind of restraining device framing my head.
Problem: I'm not sure that I've got the collar right - it doesn't at all extend to the button bands. That's the complete opposite of the photo on the pattern envelope: the collar extends all the way to their edge at centre front. How very odd.
There are no notches on the collar to show where it is supposed to hit any specific points, like the shoulder, so no help there. I did sew the buttonbands on correctly: the instructions show a normal seam allowance, it's not like they mean for you to completely encase the front edges. The width across also works on the finished article but for some reason the neckline seams too big for the length of the collar. I might just redraft it and stop worrying about it. But it is odd when something like that happens.
This is an old Burda pattern where you have to add seam allowance, the pattern pieces do not include them. I realised when double-checking the pattern pieces: they needed to butt up against each other to fit. I consulted the instructions (and highlighted that bit!) to make sure. Newer Burda patterns follow industry standard of including the allowance, but they didn't used to.
I even went a step further than just highlighting the instructions - I even scrawled 'Add Seam Allowance!' in big, fat marker on a few of the bigger pieces so I'd remember when I use this pattern again. I know how easy it is to forget and just cut out as normal.
I am please with how far I've got. Now I need photos of me modelling it because the mirror only shows a static view and restricted angles. Then I'll do some more thinking.
I will want to do more sewing now, to keep my momentum going, who knows I might just carry on with WIP! Wouldn't that be a novel thing?
More photos:
![]() |
| Burda 6230 muslin, in muslin |
![]() |
| This shows how thin the fabric is. The back |
![]() |
| You can also see the seams on the other side. Cuff in place |
![]() |
| Slightly better details |
I "just" need to do the buttonholes and sew on buttons. Once I know what buttons I want to use. On the other hand I don't have a lot of sewing thread left, do I perhaps want some kind of snap or other closure instead? I'll need to think that over a bit first.
The other thing I'll have to do before thinking about the proper project is to get photos of me wearing this. I'll be able to tell how much shorter I want the white blouse to be.
I have the white fabric right here to use but I'm reluctant to jump into carrying on. I feel that I need to take a little time to consider how I want the white blouse to be. The sleeves do drag a bit funny and seem to twist a little, luckily they are about the right length. The cuffs fold back on top of them instead of lengthening the sleeves as I thought, but they're still a good length on me.
The cuved baby hems turned out really well, I'm happy I did them. I also really enjoy how much I could practice my 'accurate' sewing. Looking quite good in most places!
The standing up collar seems a bit tall - it comes up too high and that make me feel a bit 'wedged in', like the collar is some kind of restraining device framing my head.
Problem: I'm not sure that I've got the collar right - it doesn't at all extend to the button bands. That's the complete opposite of the photo on the pattern envelope: the collar extends all the way to their edge at centre front. How very odd.
There are no notches on the collar to show where it is supposed to hit any specific points, like the shoulder, so no help there. I did sew the buttonbands on correctly: the instructions show a normal seam allowance, it's not like they mean for you to completely encase the front edges. The width across also works on the finished article but for some reason the neckline seams too big for the length of the collar. I might just redraft it and stop worrying about it. But it is odd when something like that happens.
This is an old Burda pattern where you have to add seam allowance, the pattern pieces do not include them. I realised when double-checking the pattern pieces: they needed to butt up against each other to fit. I consulted the instructions (and highlighted that bit!) to make sure. Newer Burda patterns follow industry standard of including the allowance, but they didn't used to.
I even went a step further than just highlighting the instructions - I even scrawled 'Add Seam Allowance!' in big, fat marker on a few of the bigger pieces so I'd remember when I use this pattern again. I know how easy it is to forget and just cut out as normal.
I am please with how far I've got. Now I need photos of me modelling it because the mirror only shows a static view and restricted angles. Then I'll do some more thinking.
I will want to do more sewing now, to keep my momentum going, who knows I might just carry on with WIP! Wouldn't that be a novel thing?
Labels:
blouse,
collar,
cutting out,
hem,
learning,
neckline,
pattern,
problem,
sewing,
shape and fit,
shirt,
sleeve,
wearable toile,
WIP
Wednesday, 14 December 2016
WIP: Sleeveless tunic with clever pockets
This is one of the unfinished objects (UFOs) that I want to include in the virtual sewalong event of the Dressmakers (LDC) group: "UFO: Alter, chuck or finish?".
When I bought YET more fabric a couple of years back, like this one that looks like brushed cotton or similar to denim, I felt that I needed to use the fabric up as quickly as possible and went with what I thought would be easy.
Use my own measurements, copy the pattern pieces off my body block and go with straight princess line seams (going straight up into the shoulder so no convex curves need pinning against concave curves). A yoke for the back to avoid needing to sew over eight layers of fabric, and a side zip.
Unfortunately this did not turn into a quick project because it's STILL not finished. Yup. Bane of my life.
I think the ideas above are not bad - they definitely make sense. It's just that I ran into some problems that I had not anticipated.
1) It is too big: the pins above show where I want to take in the princess seams so I can get at least the impression of a waist. My body block does not have much of a waist and that acts like a sack pulled over my body: it makes it appear even more dumpy than it is. Definitely needing improvement.
There are quite a few layers of fabric, thanks to the pocket construction. I don't feel very confident at doing a good job when I finally do take these seams in.
2) I already put the side zip in and quite well too, thanks very much, so I am really loathe to have to unpick it. Particularly as I managed to sew over the pocket layers. Can I get away with just tightening up the princess seams or do the side seams also need cinching in? How the heck would I then get the zip back in?
3) The pockets: I am so proud of their construction. The fabric layer that comes down from the shoulder then disapears into the pockets and becomes the inner pocket. The added piece that is the outside of the pocket will then go down to the hem. Which means that the patterned FQ that's the pocket lining and that first fabric layer (the one running down from the shoulder) do not need to be as long as the hem. I just don't know yet how deep I want my pockets to be so I have not cut the bottom edge of both fabrics. That'll be easy.
The blue side is the right side of the fabric, the black side is the wrong side of the fabric.
4) Unfortunately I the pieces too much for the skirt part - I made these much too wide at the hem. I did not expect the fabric stiffness to turn the middle panel into the shape of a sky jump, from the bust downward: there is no dip - it looks awful. It emphasises my stomach too, horrible. This is actually the worst problem with this garment.
I have to take the flare down a lot. Unfortunately I don't know by how much and I feel anxious about messing up at this point.
5) I made a mess of the back yoke. The back neckline gapes so I just put some darts in and not at all well. I will have to unpick them. I only realised since this project that I have a rounded upper back and need small darts at the back mid shoulder point that will take the fullness out. Unless I try a dart at the centre back? I'm not sure that this would work though.
6) I don't have a photo of the small of the back but I got that wrong too: I thought I could introduce a swayback adjustment by manipulating the shape of the middle panel of the back. And pinching a wedge out of the side panels before cutting them out. I may not have done enough of that because it hasn't worked.
I wonder if I have enough fabric left to try just the back again? I may have to research swayback adjustments a lot more because I have the distinct feeling that I don't know enough about them yet to get them right.
So there you have it.
I put a few good ideas into this self-drafted pattern. I ran into some problems where my body block isn't good enough: namely at the waist and also regarding my swayback and my rounded upper back (my body block pattern actually has the darts drawn in - silly me decided to ignore them. Ahem).
I also ran into some problems that confounded me: how can this little bit of flare be too much? And how do I get rid of it?
I think I would have carried on with this tunic sooner if there had been only a couple of problems. That many really put me off. The most decisive problem though is that I don't think I'll enjoy wearing this even if I do get it done.
On the other hand this tunic is a good practice piece to figure out these kinds of issues so I can use whatever I learn for future projects - I just didn't expect one single project where I get to learn quite so much! It just all feels a bit too intense.
On the other hand and being brutally honest with myself, I might not have carried on even with just a single issue: I often grind to a halt and find it very difficult to motivate myself into picking it back up. If I want to wear it then things are a lot easier - but if I don't feel the project, or can't visualise myself in it, then I have a huge sewing mojo problem.
Oh heck.
Trying to make up my mind about "Alter, chuck or finish?", I find myself in the "Finish" camp: I would really learn a lot and I want to see the pocket construction realised in a complete project. Even if I then give the whole thing away to a charity shop - if I don't wear it. Who knows.
I ought to decide which of the above issues I feel like tackling first - that would go a long way towards getting back into the swing of things on this project.
When I bought YET more fabric a couple of years back, like this one that looks like brushed cotton or similar to denim, I felt that I needed to use the fabric up as quickly as possible and went with what I thought would be easy.
Use my own measurements, copy the pattern pieces off my body block and go with straight princess line seams (going straight up into the shoulder so no convex curves need pinning against concave curves). A yoke for the back to avoid needing to sew over eight layers of fabric, and a side zip.
Unfortunately this did not turn into a quick project because it's STILL not finished. Yup. Bane of my life.
I think the ideas above are not bad - they definitely make sense. It's just that I ran into some problems that I had not anticipated.
There are quite a few layers of fabric, thanks to the pocket construction. I don't feel very confident at doing a good job when I finally do take these seams in.
3) The pockets: I am so proud of their construction. The fabric layer that comes down from the shoulder then disapears into the pockets and becomes the inner pocket. The added piece that is the outside of the pocket will then go down to the hem. Which means that the patterned FQ that's the pocket lining and that first fabric layer (the one running down from the shoulder) do not need to be as long as the hem. I just don't know yet how deep I want my pockets to be so I have not cut the bottom edge of both fabrics. That'll be easy.
The blue side is the right side of the fabric, the black side is the wrong side of the fabric.
4) Unfortunately I the pieces too much for the skirt part - I made these much too wide at the hem. I did not expect the fabric stiffness to turn the middle panel into the shape of a sky jump, from the bust downward: there is no dip - it looks awful. It emphasises my stomach too, horrible. This is actually the worst problem with this garment.
I have to take the flare down a lot. Unfortunately I don't know by how much and I feel anxious about messing up at this point.
6) I don't have a photo of the small of the back but I got that wrong too: I thought I could introduce a swayback adjustment by manipulating the shape of the middle panel of the back. And pinching a wedge out of the side panels before cutting them out. I may not have done enough of that because it hasn't worked.
I wonder if I have enough fabric left to try just the back again? I may have to research swayback adjustments a lot more because I have the distinct feeling that I don't know enough about them yet to get them right.
So there you have it.
I put a few good ideas into this self-drafted pattern. I ran into some problems where my body block isn't good enough: namely at the waist and also regarding my swayback and my rounded upper back (my body block pattern actually has the darts drawn in - silly me decided to ignore them. Ahem).
I also ran into some problems that confounded me: how can this little bit of flare be too much? And how do I get rid of it?
I think I would have carried on with this tunic sooner if there had been only a couple of problems. That many really put me off. The most decisive problem though is that I don't think I'll enjoy wearing this even if I do get it done.
On the other hand this tunic is a good practice piece to figure out these kinds of issues so I can use whatever I learn for future projects - I just didn't expect one single project where I get to learn quite so much! It just all feels a bit too intense.
On the other hand and being brutally honest with myself, I might not have carried on even with just a single issue: I often grind to a halt and find it very difficult to motivate myself into picking it back up. If I want to wear it then things are a lot easier - but if I don't feel the project, or can't visualise myself in it, then I have a huge sewing mojo problem.
Oh heck.
Trying to make up my mind about "Alter, chuck or finish?", I find myself in the "Finish" camp: I would really learn a lot and I want to see the pocket construction realised in a complete project. Even if I then give the whole thing away to a charity shop - if I don't wear it. Who knows.
I ought to decide which of the above issues I feel like tackling first - that would go a long way towards getting back into the swing of things on this project.
Sunday, 4 December 2016
My sewing pattern stash
For years I was careful about how many sewing patterns I bought: I didn't want to accumulate yet another stash that I can never fully use. But then pattern buying also became instant gratification in terms of seeing it and buying it. Not so much in actually making the garment.
Which is exactly the same problem with my fabric and my yarn stash. Thank goodness I don't have aspiration to start spinning my own yarn! But I should also mention my stash of quilting fabrics and the three wadding pieces I own. Ah well.
I really like this Donna Karan skirt (Vogue 1324) and made it in a firm knit fabric.
Going back to my sewing patterns: I particularly like to buy those that I think may only be around for a time and then get discontinued. They often have a feature I really like or present a sewing challenge - like Dolman sleeves or eliptical side pieces for a skirt that doesn't have "side" seams as such (V1324), see photos above. Or the envelope wrap below (V8721) that I made twice, and that then turned out not to suit my shape.
Ah well. You live and learn.
But way too many of my patterns are just sitting around and don't get used. Another source of frustration.
I had a good thought today: I want to become more familiar with the sewing patterns I own.
When I look at a pattern I like that I may want to buy, I do compare the line drawing to those patterns I remember. I hope I haven't bought too many that are very similar - it's an easy thing to do because the fabric, colour and pattern on the pattern envelope often makes us think that we are looking at a design we don't yet have. If all patterns showed the same colour and very similar fabrics then I don't think we'd buy duplicates as often as we do.
I think I've done pretty well. I hope. If I do come across a pattern that's pretty much like another one then I can get rid of one of them - which makes me want to identify them.
My purpose for wanting to become more familiar with my pattern stash is different: I want to figure out what kinds of designs I have and how they work with my body shape.
Some time back I made about seven different versions of an easy kimono style top. Two of them are tops I actually like to wear (like the grey one above), the others not so much. It is just not a style that's flattering on me. So I'm determined not to make any more.
I only made a muslin of this one, and threw it out straight away because it was so awful on me:
But what styles do suit me? I'm not actually that sure.
I think anything with a low but narrow V-neck would be great. Anything that doesn't emphasise the waist. Styles with bust darts are good, those without are a definite no-no (see V8877 above). Boat necks are out, cap sleeves that are too short look awful and I like to lengthen them by at least two inches, then they're great. Trousers and skirts with flat fronts are good. Skirts that flare from the hip are wonderful.
I figured those kinds of things out.
But I do have patterns that don't necessarily fall within the above - or at least I'm not sure if they do. And it is those patterns that I would like to try out: just cut out, make up in any old fabric (I have so many!) and see how the design works for me.
It would make me use up fabric, increase my sewing mojo and allow me to learn more about what suits me.
I am very hopeful that I will sew more with the above in mind.
Which is exactly the same problem with my fabric and my yarn stash. Thank goodness I don't have aspiration to start spinning my own yarn! But I should also mention my stash of quilting fabrics and the three wadding pieces I own. Ah well.
![]() |
| Interesting style, but what would it look like on me? V1381 |
Ah well. You live and learn.
![]() |
| Great style, not so good on me V8721 |
I had a good thought today: I want to become more familiar with the sewing patterns I own.
When I look at a pattern I like that I may want to buy, I do compare the line drawing to those patterns I remember. I hope I haven't bought too many that are very similar - it's an easy thing to do because the fabric, colour and pattern on the pattern envelope often makes us think that we are looking at a design we don't yet have. If all patterns showed the same colour and very similar fabrics then I don't think we'd buy duplicates as often as we do.
I think I've done pretty well. I hope. If I do come across a pattern that's pretty much like another one then I can get rid of one of them - which makes me want to identify them.
My purpose for wanting to become more familiar with my pattern stash is different: I want to figure out what kinds of designs I have and how they work with my body shape.
![]() |
| I like wearing this top, but does it suit me? |
Some time back I made about seven different versions of an easy kimono style top. Two of them are tops I actually like to wear (like the grey one above), the others not so much. It is just not a style that's flattering on me. So I'm determined not to make any more.
I only made a muslin of this one, and threw it out straight away because it was so awful on me:
![]() |
| V8877: Nope, not a style for me: no bust dart |
But what styles do suit me? I'm not actually that sure.
I think anything with a low but narrow V-neck would be great. Anything that doesn't emphasise the waist. Styles with bust darts are good, those without are a definite no-no (see V8877 above). Boat necks are out, cap sleeves that are too short look awful and I like to lengthen them by at least two inches, then they're great. Trousers and skirts with flat fronts are good. Skirts that flare from the hip are wonderful.
I figured those kinds of things out.
But I do have patterns that don't necessarily fall within the above - or at least I'm not sure if they do. And it is those patterns that I would like to try out: just cut out, make up in any old fabric (I have so many!) and see how the design works for me.
It would make me use up fabric, increase my sewing mojo and allow me to learn more about what suits me.
I am very hopeful that I will sew more with the above in mind.
Labels:
insight,
problem,
project plan,
sewing,
shape and fit,
stash
Sunday, 17 July 2016
The beautiful sleeve feature of Lekala #4370
... and how to sew it!
I think I figured it out. The instructions on how to insert the top of the sleeve into Lekala blouse pattern #4370 are not very helpful at all.
This is what it says:
"6. [...] Pin sleeve, right side together, and sew on short vertical edge from mark upwards. Snip front and back between dart lines from shoulder seam to horizontal marks. Sew section of shoulder seam, from slashed section exactly to sleeve connection line, inserting sewn section of sleeve. Serge seam allowance. Sew shoulder edge to neckline. Serge seam allowance. Lay upper section of sleeve (epaulette) on front and back, evenly distribute the width. Sew the dart of back and front with one seam, catching upper edge of epaulette. Serge seam allowance."
WHAT???
That makes absolutely no sense. The part that I left out (denoted as [...]) reads: "Turn lower edge of sleeve twice inside at 0.5cm and topstitch. Trim seam allowances on sleeve in corners according to marks."
Let's take that one at a time: "Turn lower edge... etc... and topstitch" must be about hemming the sleeve. 'lower edge of sleeve' equals sleeve hem, got it. I didn't do that - I don't like how double-folded hems pucker and won't lie flat. I think they are ugly and way too tricky to sew. I like my baby hems but then I am very lucky to own an overlocker: I overlock the raw edge, machine baste my intended folding line using a 0.5cm stitch length, press the seam allowance over with the iron, folding at exactly the basted stitch line (makes it easier to fold over too, it's not just a great guide) - this shrinks the seam allowance in curved bits so it's all good. Then I edge-stitch the hem by machine an even amount from the hem edge, depending on the weight of the fabric: thin fabrics closer like 1mm, and others with a bit more of a distance: 2-3mm (I haven't done this with chunky fabric, it might be better to use an inner facing [maybe out of a thinner fabric that colour matches?] instead of folding the edge in)
Next point in the left-out bit: "Trim seam allowances on sleeve in corners according to marks." - This is the bit I understood! Yay me. There are short diagonal marks within the seam allowance only in the corner between the epaulette part (I called it the rectangle at the top of the sleeve head. Okay-dokey 'epaulette' is shorter, let's go with that) and either side of the sleeve. That needs to be snipped (staying within the seam allowance, you don't want to slash into your blouse's visible sleeve fabric), otherwise those corners just won't sew well and it would look terrible even if you managed that. And yeah, stating 'trim' is not the same as 'snip' but I think that's the poor translation at work.
So far so good. Where the instructions lost me was: "Pin sleeve, right side together..." ...and my brain went: What??? What the hell is that supposed to mean? I think the clue actually lies in "sleeve" instead of "sleeves" - I didn't catch that the first two dozen times when I read that. (And I think it should say "right sides together", there ain't just one if it's two things being put together)
Where the instructions fall down severely is that there isn't much in the way of marks on the sewing pattern. There are those diagonal marks (yep, found that, that's cool) and there are also horizontal marks that intersect the darts, both on the front and on the back piece. But there is absolutely no placement line for where that blasted epaulette is to go! (The counter part to the sleeve notches are also missing on the front and the back piece pattern pieces. Tut. But you can wing that)
That's a really bad pattern design.
I had decided that the epaulette part would have to be stitched on top of the outer part of the front and back piece across the shoulder seam. There is no rectangular shape that the epaulette edges fit to. On the other hand there is no need to have only one layer of fabric at the top of the shoulders if it is easier to just sew one layer on top of another. I'm fine with that.
But why in god's name can't there be placement lines? That's what I want to know. It would save a lot of headache. The other desing downfall of the pattern is that the sleeve pattern piece is not marked about which side goes towards the front and which the back. That's terrible.
I worked out that the shorter, more curved side goes towards the front, and the longer, less curved side towards the back. That works. In fact the initial curves (at the outside corners, where you sew the lengthwise sleeve edges together, the point where that seam hits the body side seam) do actually fit very well into the armhole (again: the missing notches are not desperately needed). Success!
But then... blimey! At some point you have a heck of a lot of sleevehead edge that's excessively long and that's to be fitted into the normal sized armhole? No-one said anything about gathering and the pattern drawing doesn't show that either. So how is that supposed to work?
The bit where it says "evenly distribute the width" does not express the same as 'gathering' and I decided it just means to place the width evenly across where you're going to stitch it down. But flat. Definitely flat and ungathered.
And here's where the light bulb suddenly came on: "Pin sleeve, right side together" - that's just one sleeve, and you pin one bit of this sleeve to another bit of itself! Seeing as the text continues with: "sew on short vertical edge from mark upwards", and the mark was those short diagnoal marks in the corner that were snipped, it must mean sew one of the short vertical edges (of the epaulette) to the other short vertical edge of the sleeve - in effect producing a box pleat!
Flipping heck!! Couldn't they just say so?
The flat width of the epaulette (from stitch line to stitch line) is 20.3cm. The distance of marks across the front dart to the mark across the back dart (once the shoulder seam is closed which you're not supposed to just yet) is 10.4cm - not quite half of the 20.3cm but what with turn of cloth, this works out as near as damn it: sewing right side to right side of the short vertical edge must mean that you end up with half the epaulette width!
Bingo.
Phew! I think I figured this one out. There might still be some other surprises in this project to do with the sleeves but I think I've got the most difficult puzzle solved. Where the 'snip' and 'slash' instructions are concerned: forgive me but I don't think I'll do that. I think they ask you to cut the exact center along the length of the darts (not too far) but that leaves very little fabric on either side once you closed those darts "catching upper edge of epaulette", this could so easily fray in these areas - ruining a beautiful blouse. So the top edge of the epaulette gets inserted through the slash in the fabric between the dart legs? Why do I need to do that? Can't I just sew the upper epaulette edge to this placement line of the dart legs that are closest to the body centre? It'll keep that folded in seam allowance on top of the right side of the body fabric but that's hidden at the top of the sleeves, no-one is going to see that, at least not without gusts of wind.
"Snip" and "slash", yikes. No, I'd rather not, thanks all the same.
I shall report how I get on with the rest of this.
PS: In case you are wondering why I am going to the trouble of persevering with this very challenging pattern: not only is the drawing of the blouse very pretty but the real thing is even nicer! I am using a slightly heavyish polycotton that drapes very nicely and those sleeves are just gorgeous! They fall into the most amazing shape and I've not even sewn them in properly yet. I can tell from holding my 'box pleated' sleevehead to the blouse. Gorgeous I tell you!
I would love to do another version of this blouse - maybe with a back opening and a high rounded front neckline... Hmm...
![]() |
| You can get Lekala patterns via Etsy too |
I think I figured it out. The instructions on how to insert the top of the sleeve into Lekala blouse pattern #4370 are not very helpful at all.
This is what it says:
"6. [...] Pin sleeve, right side together, and sew on short vertical edge from mark upwards. Snip front and back between dart lines from shoulder seam to horizontal marks. Sew section of shoulder seam, from slashed section exactly to sleeve connection line, inserting sewn section of sleeve. Serge seam allowance. Sew shoulder edge to neckline. Serge seam allowance. Lay upper section of sleeve (epaulette) on front and back, evenly distribute the width. Sew the dart of back and front with one seam, catching upper edge of epaulette. Serge seam allowance."
WHAT???
That makes absolutely no sense. The part that I left out (denoted as [...]) reads: "Turn lower edge of sleeve twice inside at 0.5cm and topstitch. Trim seam allowances on sleeve in corners according to marks."
Let's take that one at a time: "Turn lower edge... etc... and topstitch" must be about hemming the sleeve. 'lower edge of sleeve' equals sleeve hem, got it. I didn't do that - I don't like how double-folded hems pucker and won't lie flat. I think they are ugly and way too tricky to sew. I like my baby hems but then I am very lucky to own an overlocker: I overlock the raw edge, machine baste my intended folding line using a 0.5cm stitch length, press the seam allowance over with the iron, folding at exactly the basted stitch line (makes it easier to fold over too, it's not just a great guide) - this shrinks the seam allowance in curved bits so it's all good. Then I edge-stitch the hem by machine an even amount from the hem edge, depending on the weight of the fabric: thin fabrics closer like 1mm, and others with a bit more of a distance: 2-3mm (I haven't done this with chunky fabric, it might be better to use an inner facing [maybe out of a thinner fabric that colour matches?] instead of folding the edge in)
Next point in the left-out bit: "Trim seam allowances on sleeve in corners according to marks." - This is the bit I understood! Yay me. There are short diagonal marks within the seam allowance only in the corner between the epaulette part (I called it the rectangle at the top of the sleeve head. Okay-dokey 'epaulette' is shorter, let's go with that) and either side of the sleeve. That needs to be snipped (staying within the seam allowance, you don't want to slash into your blouse's visible sleeve fabric), otherwise those corners just won't sew well and it would look terrible even if you managed that. And yeah, stating 'trim' is not the same as 'snip' but I think that's the poor translation at work.
So far so good. Where the instructions lost me was: "Pin sleeve, right side together..." ...and my brain went: What??? What the hell is that supposed to mean? I think the clue actually lies in "sleeve" instead of "sleeves" - I didn't catch that the first two dozen times when I read that. (And I think it should say "right sides together", there ain't just one if it's two things being put together)
Where the instructions fall down severely is that there isn't much in the way of marks on the sewing pattern. There are those diagonal marks (yep, found that, that's cool) and there are also horizontal marks that intersect the darts, both on the front and on the back piece. But there is absolutely no placement line for where that blasted epaulette is to go! (The counter part to the sleeve notches are also missing on the front and the back piece pattern pieces. Tut. But you can wing that)
That's a really bad pattern design.
I had decided that the epaulette part would have to be stitched on top of the outer part of the front and back piece across the shoulder seam. There is no rectangular shape that the epaulette edges fit to. On the other hand there is no need to have only one layer of fabric at the top of the shoulders if it is easier to just sew one layer on top of another. I'm fine with that.
But why in god's name can't there be placement lines? That's what I want to know. It would save a lot of headache. The other desing downfall of the pattern is that the sleeve pattern piece is not marked about which side goes towards the front and which the back. That's terrible.
I worked out that the shorter, more curved side goes towards the front, and the longer, less curved side towards the back. That works. In fact the initial curves (at the outside corners, where you sew the lengthwise sleeve edges together, the point where that seam hits the body side seam) do actually fit very well into the armhole (again: the missing notches are not desperately needed). Success!
But then... blimey! At some point you have a heck of a lot of sleevehead edge that's excessively long and that's to be fitted into the normal sized armhole? No-one said anything about gathering and the pattern drawing doesn't show that either. So how is that supposed to work?
The bit where it says "evenly distribute the width" does not express the same as 'gathering' and I decided it just means to place the width evenly across where you're going to stitch it down. But flat. Definitely flat and ungathered.
And here's where the light bulb suddenly came on: "Pin sleeve, right side together" - that's just one sleeve, and you pin one bit of this sleeve to another bit of itself! Seeing as the text continues with: "sew on short vertical edge from mark upwards", and the mark was those short diagnoal marks in the corner that were snipped, it must mean sew one of the short vertical edges (of the epaulette) to the other short vertical edge of the sleeve - in effect producing a box pleat!
Flipping heck!! Couldn't they just say so?
The flat width of the epaulette (from stitch line to stitch line) is 20.3cm. The distance of marks across the front dart to the mark across the back dart (once the shoulder seam is closed which you're not supposed to just yet) is 10.4cm - not quite half of the 20.3cm but what with turn of cloth, this works out as near as damn it: sewing right side to right side of the short vertical edge must mean that you end up with half the epaulette width!
Bingo.
Phew! I think I figured this one out. There might still be some other surprises in this project to do with the sleeves but I think I've got the most difficult puzzle solved. Where the 'snip' and 'slash' instructions are concerned: forgive me but I don't think I'll do that. I think they ask you to cut the exact center along the length of the darts (not too far) but that leaves very little fabric on either side once you closed those darts "catching upper edge of epaulette", this could so easily fray in these areas - ruining a beautiful blouse. So the top edge of the epaulette gets inserted through the slash in the fabric between the dart legs? Why do I need to do that? Can't I just sew the upper epaulette edge to this placement line of the dart legs that are closest to the body centre? It'll keep that folded in seam allowance on top of the right side of the body fabric but that's hidden at the top of the sleeves, no-one is going to see that, at least not without gusts of wind.
"Snip" and "slash", yikes. No, I'd rather not, thanks all the same.
I shall report how I get on with the rest of this.
PS: In case you are wondering why I am going to the trouble of persevering with this very challenging pattern: not only is the drawing of the blouse very pretty but the real thing is even nicer! I am using a slightly heavyish polycotton that drapes very nicely and those sleeves are just gorgeous! They fall into the most amazing shape and I've not even sewn them in properly yet. I can tell from holding my 'box pleated' sleevehead to the blouse. Gorgeous I tell you!
I would love to do another version of this blouse - maybe with a back opening and a high rounded front neckline... Hmm...
Labels:
challenge,
epaulette,
hem,
how-to,
idea,
insight,
instructions,
knowledge,
learning,
modification,
overlocking,
pattern drawing,
problem,
puzzle,
sewing,
shape and fit,
shoulder,
sleeve,
sleevehead,
workaround
Sunday, 26 June 2016
Vogue 1324 Donna Karan skirt
I did this in a heavy-ish jersey fabric I picked up from Ridley Road market, a couple of years ago.
I was surprised that this sewed quite well - and that's saying something because I've got a total hate-hate-hate relationship with jersey fabrics. I don't like them, and they certainly don't like me, and I usually make a completely mess out of jersey projects.
Oh well.
I love the Donna Karan skirt design. It is really interesting in so far as there is no vertical side seam: the panels that cover the side wrap round from the front towards the back for a bit. Not quite parabolic arches, but part of that shape.
Here's a photo to try and show the side "seam" area:
It's a bit difficult to see the seams, here is another photo of not quite the same area:
The front of the skirt is on the right-hand side of the above photo, and the back at the left-hand side (obviously).
I had huge problems with the waistband: the part that starts to one side of the front centre panel where there is no waist band, and wraps all around the back, - it gets folded over and forms the inner facing that I stitched down.
Where the centre panel was stitched to the sides of the waistband, the waistband extended way beyond this seam - I had so much left over that I laid it down towards the front centre: they didn't reach right to the middle so I just stitched them down. I had ironed some stretch interfacing to the top of the central panel to reinforce because it is a single layer right in the middle. Where I stitched those too long sides down I got three layers.
So something isn't right with this but it is probably me. I can't remember when I even started this so I may just have cut this strip too long. Or not long enough as the case may be. Who knows.
I decided to try this Vogue pattern in a jersey as a wearable toile. I could eliminate the back seam and the zip. I only stitched down the bottom of the inner facing in a few places so the fabric stretches enough for me to put it on. That works okay.
Not a great photo, but here's the whole thing. The front darts are interesting too, sat at an angle (as are the back darts):
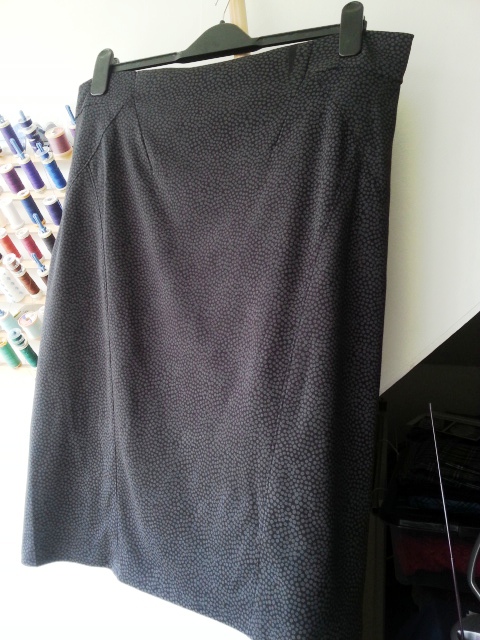
The whole skirt is not fantastic (I mean my execution of it) but I may wear this around the house. Or if I am having a scruffy day then maybe to the pub, maybe one that isn't terribly well lit, if you know what I mean...
I like the fabric so I may try to sew with a heavier stretch fabric again. Maybe. I just have that difficult relationship with jerseys: I hate them and they hate me right back. They completely misbehave for me and I usually have a huge struggle on my hands with them. I am not a fan.
I like the design enough to want to make this in a woven fabric (as intended) but I am worried that I might run into fitting issues because of those side "seams". I don't know how a woven fabric would behave in the hip area.
It took me ages to get this finished but I am very pleased that I didn't abandon this. This is huge progress for me!
I was surprised that this sewed quite well - and that's saying something because I've got a total hate-hate-hate relationship with jersey fabrics. I don't like them, and they certainly don't like me, and I usually make a completely mess out of jersey projects.
Oh well.
I love the Donna Karan skirt design. It is really interesting in so far as there is no vertical side seam: the panels that cover the side wrap round from the front towards the back for a bit. Not quite parabolic arches, but part of that shape.
Here's a photo to try and show the side "seam" area:
It's a bit difficult to see the seams, here is another photo of not quite the same area:
The front of the skirt is on the right-hand side of the above photo, and the back at the left-hand side (obviously).
I had huge problems with the waistband: the part that starts to one side of the front centre panel where there is no waist band, and wraps all around the back, - it gets folded over and forms the inner facing that I stitched down.
Where the centre panel was stitched to the sides of the waistband, the waistband extended way beyond this seam - I had so much left over that I laid it down towards the front centre: they didn't reach right to the middle so I just stitched them down. I had ironed some stretch interfacing to the top of the central panel to reinforce because it is a single layer right in the middle. Where I stitched those too long sides down I got three layers.
So something isn't right with this but it is probably me. I can't remember when I even started this so I may just have cut this strip too long. Or not long enough as the case may be. Who knows.
I decided to try this Vogue pattern in a jersey as a wearable toile. I could eliminate the back seam and the zip. I only stitched down the bottom of the inner facing in a few places so the fabric stretches enough for me to put it on. That works okay.
Not a great photo, but here's the whole thing. The front darts are interesting too, sat at an angle (as are the back darts):
The whole skirt is not fantastic (I mean my execution of it) but I may wear this around the house. Or if I am having a scruffy day then maybe to the pub, maybe one that isn't terribly well lit, if you know what I mean...
I like the fabric so I may try to sew with a heavier stretch fabric again. Maybe. I just have that difficult relationship with jerseys: I hate them and they hate me right back. They completely misbehave for me and I usually have a huge struggle on my hands with them. I am not a fan.
I like the design enough to want to make this in a woven fabric (as intended) but I am worried that I might run into fitting issues because of those side "seams". I don't know how a woven fabric would behave in the hip area.
It took me ages to get this finished but I am very pleased that I didn't abandon this. This is huge progress for me!
Labels:
challenge,
design feature,
fabric,
grey,
jersey,
problem,
sewing,
stretch,
wearable toile
Wednesday, 8 June 2016
Too big
I was complaining about how my Lucca shawl keeps coming out way too small, and I mean wayyyyy too small? Here's the opposite problem:
I made another curtain, gah! All that work and I can't really do anything with the finished item?
This was meant to be a shawl that's up to 100cm across. Instead it's a good 150cm diameter!
I can't wear that!?
I made another curtain, gah! All that work and I can't really do anything with the finished item?
This was meant to be a shawl that's up to 100cm across. Instead it's a good 150cm diameter!
I can't wear that!?
Just look at my tippy-toes at the bottom edge of the photo, for size comparison (okay, you don't see much of my foot, you'll have to imagine it - each foam tile is about 50cm across). I could have easily stretched this to even bigger, my constraint was the foam tiles. The area where the middle flowers are is a bit dense - I could have pulled this further on the outside points.
It is a pretty pattern though, I got lots of enjoyment out of knitting this. Except when I ran out of yarn. And that should have tipped me off about just how big this was going to get: I had two massive Fyberspates Scrumptous lace yarn skeins and got too close to running out - I used the dark blue yarn (also Fyberspates lace, this colour is called Midnight, my main light grey colour is called Water).
I wanted to switch to the contrast colour at a point in the pattern where it wouldn't look too horrible - this seemed as good a place as any.
I was glad to use up a stash yarn that I've had a number of years, so long in fact that I couldn't get more in the same dye lot and had to buy yet more in this dark blue. So I am left with the rest of that.
I was thinking that it might be nice to make a shawl like this in a few colours: different colorus for the centre and for portions of the outside. Not in stripes or rings of the same width, perhaps one ring that's just an inch or so if it's a good spot between two other portions of the pattern? It could look really good.
But that means that I would have to buy even more! Yikes.
But I like the idea of a shawl in different colours: I would love to use this dark blue, a light pink, a small area in white and then some other colour for the rest. I even saw a Niebling pattern that would be suitable.
But let's be honest: should I be buying yet more yarn? I mean really?
The answer to that has to be no.
But I am still tempted now that I had the idea!
It's being able to see the finished product in front of my inner eyes, that's the problem. I see something I like and I want it.
Labels:
colour,
completed project,
curtain,
knitting,
lace,
lace pattern,
Niebling,
problem,
round,
shawl,
size,
table cloth
Thursday, 12 May 2016
How could I do this again?
I have to admit to being a complete idiot when it comes to sudden
urges to buy yarn. I gave in to temptation! Yikes, and my stash is
already threatening to bend the floor boards...
I couldn't resist the thought of some lovely, plump, squishy, gorgeous Madelinetosh Sock yarn! It feels wonderful to knit with, and it feels like a luxury treatment for your feet when you wear them. Ah! I just simply cannot resist.
Too bad that I couldn't find the kind of colour I wanted, at least not for a reduced price. But then there were two websites that had some colourways that weren't too bad, at a price that was lower than normal... You guessed it: I bought both!
And then I got them home, prepared to put them away - and guess what I picked up out of my stash?
You guessed it: another skein of Madelinetosh Sock yarn!
This one in Silver Fox, that I had won in an ebay auction that I'd half forgotten about by the time I won it (bad knitter, bad, bad, bad knitter!):
I saw these and couldn't resist:
I would like to make a crescent shaped shawl in neutral colours so I thought that these black, grey and whites would be nice. But I really didn't need more yarn, I've got lots of solid grey yarn left! Yikes.
This one was a bit of a mistake. The photo and mention of silk made me think that this is shiny yarn. But that's silly, since when is silk always shiny?
It is a good quality knitting yarn that's lovely and soft. I got this from the Knitting Shop. I am thinking of making another crescent shaped shawl with this but not yet. Once I do, I'm sure that the shawl will be extremely useful.
But why oh why oh why did I buy so much new yarn?
This is terrible.
I couldn't resist the thought of some lovely, plump, squishy, gorgeous Madelinetosh Sock yarn! It feels wonderful to knit with, and it feels like a luxury treatment for your feet when you wear them. Ah! I just simply cannot resist.
Too bad that I couldn't find the kind of colour I wanted, at least not for a reduced price. But then there were two websites that had some colourways that weren't too bad, at a price that was lower than normal... You guessed it: I bought both!
![]() |
| Madelinetosh Sock - Vermillion |
![]() |
| Whiskey Barrel c LoveKnitting.com |
You guessed it: another skein of Madelinetosh Sock yarn!
This one in Silver Fox, that I had won in an ebay auction that I'd half forgotten about by the time I won it (bad knitter, bad, bad, bad knitter!):
I saw these and couldn't resist:
![]() |
| Rico Design Superba Poem - I think the colourway is Greys |
This one was a bit of a mistake. The photo and mention of silk made me think that this is shiny yarn. But that's silly, since when is silk always shiny?
| |
| This yarn is black, it never photographs well |
It is a good quality knitting yarn that's lovely and soft. I got this from the Knitting Shop. I am thinking of making another crescent shaped shawl with this but not yet. Once I do, I'm sure that the shawl will be extremely useful.
But why oh why oh why did I buy so much new yarn?
This is terrible.
Saturday, 7 May 2016
I am not a size queen, but...
This is an awkward project.
Or is it me? Am I doing something wrong?
So I started again. And again the size wasn’t what I wanted nor what it looks like in the instructions. So I started again. Yes, I know I said that already, but I did. Third yarn, even bigger needles!
Or is it me? Am I doing something wrong?
I
loved the lace-weight Pi shawl pattern Lucca by Brooklyn Tweed so much that I had to buy it. Never mind that I have a huge amounts of patterns I could do instead. Sometimes you just see something that grabs your attention and you have to go with it.
This is a pattern where you don't knit knit rows in between lace pattern rows, you do something in each row - at least in the lace pattern sections that look quite delicate.
I was very intrigued by the roundish looking pattern rows (you get to do alternate rows there!) – these turn
out to be one and a half repeats of the tulle pattern common to many lace shawl
or tablecloth patterns. You know the
patterns that make big doilies?
I am really taken with the fact that using only six rows of this
pattern gives such a different effect to what this pattern usually looks
like. In ‘doily’ patterns it is very often
used as background - typified by two yarn-overs that you have to purl and knit to in the alternative row above. What I get when I knit this it tends to look a
bit loose and rough so I am not that keen on it, I much prefer the diamond shape
pattern for lace backgrounds.
This is a really awkward pattern for me because I started it three times now in three different yarns and with increasingly bigger needles.
First attempt: petrol yarn and needles sized 3mm
Second attempt: a Fyberspates Scrumptous yarn (in DK?) and 4mm needles
Third attempt: a bright pin/purplish BC Garn Silkbloom Extra Fino yarn and x needles
First attempt: petrol yarn and needles sized 3mm
Second attempt: a Fyberspates Scrumptous yarn (in DK?) and 4mm needles
Third attempt: a bright pin/purplish BC Garn Silkbloom Extra Fino yarn and x needles
My first attempt resulted in a tiny size that’s less than half the desired size. I wasn’t keen on producing something the size of a handkerchief!
![]() |
| Pretty. But just too small. |
Second one was even worse: despite the bigger needles, this thick yarn wasn't working at all:
And the third attempt that I am determined to go with:
![]() |
| Just look at it! Tiny, compact, not what I wanted... |
And the third attempt that I am determined to go with:
![]() |
| I already increased the stocking stitch sections by a few rows |
So I started again. And again the size wasn’t what I wanted nor what it looks like in the instructions. So I started again. Yes, I know I said that already, but I did. Third yarn, even bigger needles!
I am still not terribly happy with the size I am getting – but at least
it’s a lot closer.
Maybe I can repeat some rows or pattern sections to make it bigger? But I don't understand why my attempts come out tiny whereas the original photos make this look like a very comfortable size. It is downright weird.
A funny outcome of this would be if blocking it would eventually give
me a bigger size. That has happened to me quite often: I knit and knit at this
misshapen blob of a thing and as soon as I start to pin the wetted down
shawl, it seems to grow and grow and grow!
But this project has lots of stocking stitch sections, I really don’t think
this is capable of growing much!? But if
it came out just a little bit bigger I would be very pleased.
Let me keep my fingers crossed!
Labels:
Brooklyn Tweed,
knitting,
lace,
lace pattern,
problem,
size,
versions,
WIP
Subscribe to:
Posts (Atom)