Showing posts with label summer. Show all posts

Thursday, 2 February 2017

A pretty crochet border

...or how good it feels to complete a long-time UFO.  Damn good!

I started this project, a nice, cool summer top, so many years ago that I don't remember when. Judging from intervening house moves it was at least three years ago, but could be longer.


It is finished!!!  Ta-da!

I am so pleased. The feeling of satisfaction at completing something that was cluttering up my space: it is a priceless, unbeatable feeling. To no longer come across it and having to think: "Oh yeah, I need to finish that at some point, soon, whenver...".  Such a relief!

I do have waaaaaaaaaaaaaaayyyy too many unfinished projects hanging around like a bad smell. Triggering uncomfortable, opppressive vibes.

I want to no longer contribute to even more of them. It has to stop: either complete it, throw it out or do something (whatever it is) with it. Give to friends, to a charity shop, rip it back down if it's knitted, throw it in a clothes collection bin for making blankets out of or whatever they do...

I don't intend on exposing myself to the disheartening pressure of wanting to go through everything I have lying around and get this fixed right this minute, if not yesterday - I will take my time over it.  I am able to do this on a gradual basis, I don't have to stress myself out.  I will look at a few projects at a time, both knitting and sewing or quilting projects, and decide on which one 'grabs' me the most.  I like using spontaneous urges that have me pick up one specific thing - it usually means that I successfully deal with it.

As I mentioned, my sewing group is having a two-part sewalong on looking over UFOs, one was in January, the next one Part 2 is in March.  This proved extremely beneficial: I got the urge to look at just this or that UFO, and had started to do a little sewing here and there too.

Then I came across some of my knit UFO projects that are too numerous to mention - this is just the first one I was able to do something with.  I had absolutely no idea how I was going to deal with a gaping big neckline, the thought of knit ribbing was a bit offputting.

Seeing how pretty this crochet border looks, I am extremely glad that I looked for something else.  I do save a lot of photos I find inspiring. One of them was of a page in a Japanese book, an edging there inspired the top half of my border. I improvised the other part at the bottom:


I put down a foundation row of double crochet stitches.


I was able to go 'around' the corners by not crocheting into every stitch. The top part of the pattern then also missed out a stitch here and there to make it lie flat.


Same at the back.  You can also see that my "seam line" between sleeve and body looks a little odd. I used the seamless method* by decreasing at this point in every second row. The kink in the line comes from switching from decreasing in the body area to decreasing at the sleevehead.

This method is probably a bit better for fibres that are smoother and will pull into place a bit better than this cotton yarn.

I made the ribbing in a K2 P1 pattern.


This photo shows the problem of the neckline very well: not only is it too big, the fabric also rolls in as well as out in several places. This would have never looked good or felt comfortable if left like this - I was really unsure what to do with it for a long time.

I can also see now that I could have decreased between sleeve and body a little more further down. You live and you learn!

Overall I am content but not ecstatic with how the top looks on me.  I am utterly delighted in an over-the-moon way that I finished it!

Yay me.

Now where is that other WIP where I need to do my magic with the squashed sleeveheads? Lemme at it!


PS: The seamless sweater method* has been explained by Elizabeth Zimmermann in at least one of her books, and also by Tuulia who developed a pattern that you can buy.

Thursday, 19 March 2015

Aubergine Viscose top

[Note: Another blog post that I wrote ages ago and hadn't yet published. There is an update at the end.]

This is my purple viscose yarn top which is wonderfully cool to wear:


The colour looks a lot more aubergine in real life, whereas the photos make it look like a blu-ish purple. The yarn is a very slippery Drops Cotton Viscose (Ravelry link)


In the process of knitting up the back, which presented a multitude of problems: it got too wide, it got too narrow and I ended up ripping this down a few times.


The front drapes very well, the stockinette back... not so much.  It's okay though, I can live with that.

Update:
I now wonder if I can really live with the back being quite so shapeless. Reason being: I haven't worn this top once! Oh no. And I keep thinking of the lovely yarn and how nice it would look if I made something else out of this...
Even more: 'oh no'. I have too much wool! I cannot possibly start ripping down fully made garments to re-use the yarn! I Just. Simply. Cannot.
End of story.

So I should try to wear this as soon as the weather gets warm enough again this year. Maybe I can think of a fix.

Maybe I could sew 'design' welts into the back to take it in in strategic places, or gather into pleats at the centre back: lower down where the small of the back is. Something like that.
I'll see if the mood strikes me.

And that's my update. Um.

Monday, 17 February 2014

White top finished

It is done, my lovely bias-cut summer top is finished!  I can't believe how quickly it came together.


I already blogged about the process of making this here.  So I'll try not to repeat myself.


I attached the bias strips at the armholes and the neckline.  Because there were some wavy pin tucks that distorted the bias strips, I ended up ripping them out to try and make the strips lie flat.  Then trimmed to the right width a second time. Even with plenty of water and steam it wasn't that easy to stop the former tucks from puckering up.  But it went well enough.


I had no idea that the bias strips get sewn onto the edge laid double, so you stitch through three layers of fabric (that was an Aha! moment) and then, after trimming, the whole doubled roll where its edge ends with the closed lengthwise fold - the whole thing gets folded inside the garment.  I had always assumed that you still see it above the top stitching line on the outside, but no: the fabric you can see on the outside is still the same front or back piece you originally cut out.  And nothing added.  What a revelation!


I feel that the hem was the part that went the least well. I didn't attach bias strips: I machine basted this 5-6mm from the edge (about a quarter inch), folded over at that line and pressed with lots of water.  Then still quite moist I folded this pressed strip over again to hide the raw edges and encase them, pressed some more, and then sewed this up.

The machine pushes the top layer of fabric ahead and creates these puckers.  I will figure out the dual feed function and see how much this improves things.  Wish me luck!


I am so pleased with this.  It looks lovely.  Really pretty too.  Can't wait for summer.

Saturday, 15 February 2014

White wavy lines summer top


I am rather excited:  I am sewing a pretty simple looking white summer top out of only two pieces, plus bias strips and I get to try three new things I never attempted before.

I am using bias strips, as already mentioned, haven’t used those in dressmaking before (I did use a few for quilt binding, so at least they’re not new-new to me).

I sewed my first French seams – which felt oddly scary before I tried them - what if a whole strip of fabric shows on the right side?  What if I try to cut those bits and make holes?  What if frayed bits and thread ends protrude?   What if...  Huh, yeah, funny:  none of that happened.

I must say that that I only did a scant quarter inch of the seam with the wrong sides together, and then a very generous quarter inch with right sides together.  The fabric is pretty thin so after pressing these seams look beautiful.  I am very pleased with them!

And the best of all the new things: I am trying bias cut for the first time!


I was going to do two halves for both the front and the back and use centre seams - because fabrics cannot be made evenly woven anymore: the tension from warp and weft are slightly different from the manufacturing process so when you cut a whole front or back piece at a 45 degree bias then one half is going to behave differently than the other half.

Cutting two halves at symmetrical orientation and sew together with a centre seam is supposed to avoid this.


I didn’t bother in the end because the fabric piece wouldn’t have yielded four halves and I didn’t want to piece one of the halves.  So I am trying full pieces to see how that goes.  I will try the centre seam idea with a different fabric at some point later – just to compare.

It is going really well and I’m thoroughly enjoying how stretchy the fabric is when cut on the bias: you don’t need a zip or other opening, this slightly loose top is so stretchy that you can pull in on over your head and the fabric nor the cut is worse for, err, tear – I should say pulling.  Oh well, not my best pun...

I haven't attached the bias strips yet to the armholes and the neckline.  I cut them slightly wider because I was worried about the wavy pin tuck lines that are a feature of this fabric.  I would have preferred cutting the strips from areas without tucks but didn’t manage.  So I cut them wider but then ironed them folded double as instructed by the pattern.

I think I should be able to just trim them lying double to the width I need.  If it doesn't work I can cut some more, I have fabric left.  If these strips don’t work that I cut lengthwise along the pin tucks, then I can try cutting them “against” the grain – but I really want to avoid the bulkiness from those tucks.  Perhaps I should try ripping out the tucks and working with fabric rendered flat?

I shall have a think about this.


I am so very happy about my learning experience from just this one little top that looks so deceptively simple.  I was not planning on French seams when I started, they just seemed a good idea.  It feels like such a fabulous thing to be able to add these seams as a sewing technique to my tool kit!

I also wondered if I should do inner facings against the armhole and neckline edges like I always do, but I didn’t fancy them turning inside out when you put the top on.  They would also show up quite a bit because the fabric is so thin.  Also, I should think about making a suitable slip to wear underneath this – it is that see-through.  Something with thin straps and a very simple shape that drapes well around your body, that would do a good job.  Not out of satin though, that would be too thick and satin is such a pain to sew.

But it’s the bias cut that’s the revelation: I had no idea how pleasant it feels to have a bias-cut garment hug you when you wear it.  How nicely it skims over your curves.  It is just such a lovely feeling to wear something this supple and slidey.  If I didn't dislike satin so much I would want to do a black satin number, perhaps a slip or negligee (not to go with this, as a separate project) – maybe I can find a way of getting around the slipperiness to make satin a bit more easy to sew with?  (There is a gelatine trick I could try)

I will definitely make more bias cut garments.  They do take a lot more fabric (of which I have more than plenty!) and are a pain to cut out (getting that 45 degree angle right ain’t all that easy) but it makes for such beautiful garments that are a pleasure to wear!

The next one will have to be in a fabric with an exciting pattern.  I almost used a plaid before I realised that this tartan is printed at a 45 degree angle so a bias-cut would have put the tartan back into right angles.  I didn’t think it would look all that exciting when the original fabric would be fantastic cut on the grain.

I need to dive back into my fabric stash.  I had quite a hard time finding this fabric to use but I’m pleased I went with this one: the pin tuck wavy lines come out great on the bias – it wouldn’t have looked as interesting at a straight grain.

It is so lovely to learn a new sewing technique!  Such fun.

Saturday, 16 November 2013

Pink summer skirt

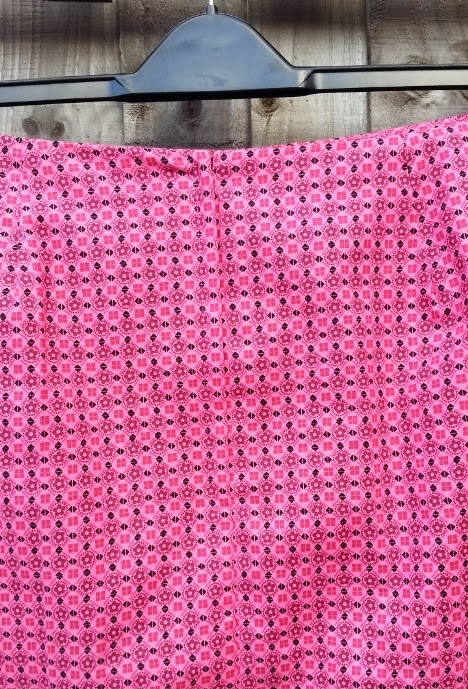
I ordered this pink patterned cotton fabric online, for quilting.  But the colour is so very bright it doesn't go with anything else I've got.

What to do.  Make something else!

Like... maybe a skirt?

Good idea.  Here we go:


I'm really pleased how this came out. It's a length I like on me.  I tried to make this pattern before (my grey inverted pleat skirt) but messed up the pattern piece for the second version.  This is basically version number 3.


This is also my first lapped zip.  I had always tried to do invisible zips before, or whatever the technique was that I was going for.  I'm not really too sure about that point to be honest.

The idea was to do this type of zip in a workshop given by a friend of mine.  I ended up taking another fabric along to this. 

But my sewing machine manual gives detailed instructions on this kind of zip.  With plenty of graphics.  I like a good graphic or two (dozen), they're right up my street.

It went beautifully!


I am exceedingly happy with the evenness of the two halves of the back: to the left and to the right of the zip.  It is so easily done to have one side be higher than the other.  My solution to getting around this problem: I put the zip in first, and only then attached the two facings that fold inside.

The first facing is easy: plonk it in any which way you like.  The tricky one is obviously the second one.  I had pinned this and checked very carefully when I put the sewing machine needle down.  I'm sure I corrected the needle placement at least once before I ever started sewing.  You can also swivel things round if you feel like it when you have the needle in the fabric - so you can check a different angle, if you feel this helps.  Make sure you're happy with where this second seam is going to be, and you're good to go!

* * *

I have to say though that I cut the lining too small for the front and found that I couldn't attach it to the facings very well at all.  I ended up pushing this piece under the facing and sewing on the right side. Which would have been okay, except I attached it correctly at the bank.  There is some very unsightly bunching going on at the change from front to back.  I learnt something else: if you do a thing one way, don't suddenly go and do it a different way in another part of the garment when those two areas need to be attached to each other.
A-hum, okay.

* * *

I am already blogging about this though I still have to fix one issue. I twisted the bottom of the lining a bit and want to un-do that half. It shouldn't take long to do and it also looks done. So there.

Nice little summer skirt for next year.

Very happy.

Saturday, 13 July 2013

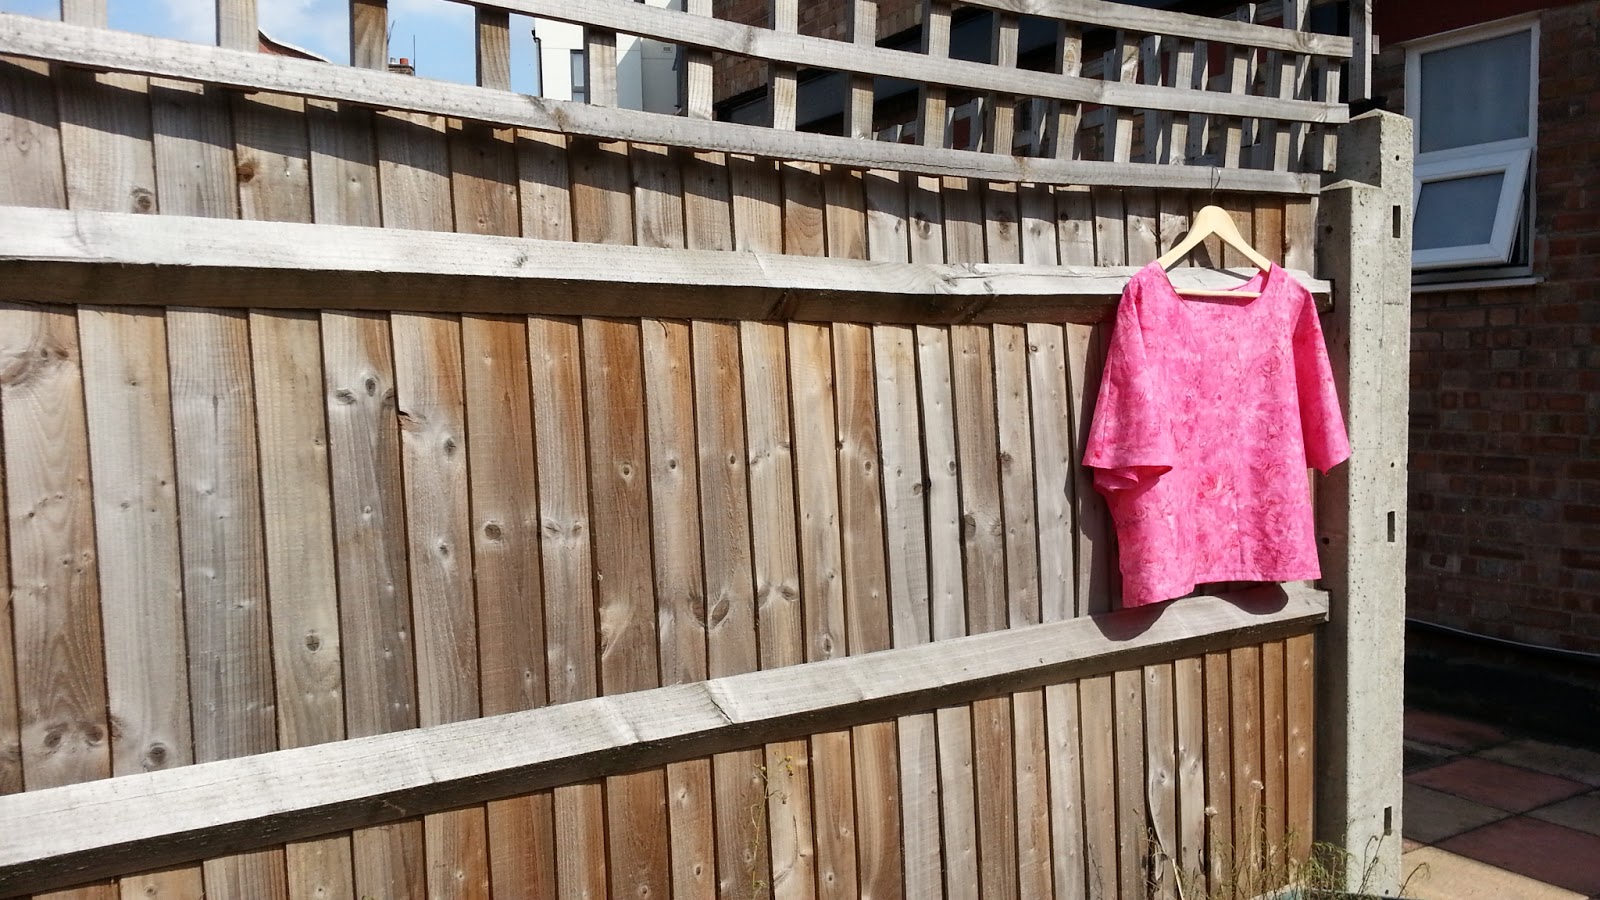
I sewed something! A pink pieced summer top


I hate when people start posts by saying sorry about not updating for so long, - and now I'm about to do that myself  smacks forehead

Several reasons: + there's so much stuff to have fun with and so little time. + I haven't felt very bloggish (if that's a word). + I can no longer access Blogger at work (those Internet filters, tss). + And I suppose to some small degree I don't feel that this blog is being read. Probably coz there are hardly any comments - but at least I get to show my family the pictures of the stuff I made, so that's definitely worth it!

And now I made something I'm beyond proud of and really chuffed with. I did some dressmaking! Yay, yay, yay!  I can't even begin to say how happy that makes me. I keep thinking about and incessantly talking about making stuff to wear, something that's me, something that's fun and individual and stylish... and then I just don't. Setting expectations too high?  In any case that lack of follow-through is getting seriously on my nerves.

What happened was that earlier this week I had this sudden overwhelming urge to rush home and get stuck in to try and make a top, any top, in any fabric I've got, any pattern - as quickly as possible - to try and stoke that sewing mojo.

Boy did that work!  Okay, so it took me four days to really get started. Getting a phone call that ends up in a long chatty conversation isn't exactly conducive to a sewing blitz. Still, I did pick the fabric. And so pretty it is too!


I went to my trusty 'two-piece inclusive of sleeves' pattern (can't remember what the original commercial pattern was, I'll post once I find it again - I made this twice before: Grey damask top and Black and white linen tunic) and started today, intention: just cut out the back. I didn't stop there, I carried on!

I didn't have a lot of fabric so the front couldn't be cut in one piece. Thank goodness for my patchwork skills from making quilts: I pieced the front by slashing it both vertically and horizontally.


I inserted a strip at the waist and then I had to piece another strip for the centre front. It's a bit patchworky but I reckon that gives it its own charm.  I did baby seams for the neckline and sleeve hems, and I used a technique I saw on Google+ for the hem itself: using a longer stitch length sew a straight line along the bottom edge (my thread blends very well with the fabric).

This stitch line ends up as the turning "ridge" so it needs to be at that sort of distance from the edge.  I had already overlocked all my raw edges so I only turned up the hem once at that turning ridge stitchline and pressed, then I stitched it down about 1.5cm from that topstitched line.  You can use this for hems of very full skirts, like circular skirts.  Just adjust the topstitching tension to a little tighter and press the upturned fabric with plenty of steam to shrink it a bit.  I didn't do that here because my bottom edge is dead straight.

I really like that the top irons fantastically well.  It's just a shame that it is a bit short, but hey: it's for summer, so who cares.

I did it! I made a top in a day!*

I am so, so, so happy. Well done me.


(*: It was only in one day because I have the pattern cut out on lining paper (the stuff you use when wallpapering), and I know it fits due to adapting it between the two versions I made before. So one day from cutting out the fabric and not counting all the work you normally do to get to that stage)

Tuesday, 3 July 2012

Black and white linen tunic

And here's a project that only took me two hours:

I love this.  It is the sort of shape I wanted, the length is just right: just above mid thigh, the neckline isn't too wide and sits relatively well (I could do with some loops on the inside to anchor the shoulder seams to the bra straps).

I shouldn't have been in quite such a rush: I forgot to top stitch the neckline before turning it in and stitching it down: it does gape a bit.  I can still do that now, not a problem.

This is the same pattern as the grey damask top, only longer.  My changes: I lengthened the sleeves by extending the line from the shoulder (a touch at the bottom as well) - this changed the angle that the sleeve seams sit at.  Much better!

The sleeve seams are unfortunately rather stiff from turning the hems in twice - this linen is stiffer than I expected.  They look as if I sewed in some embroidery hoops!  I plan on forming an inverted pleat at the top seam: hold it down with a couple of press studs and add a pretty button to the outside.  That should do it.

I will report on my progress.


I could wear it, that was the main thing for me.  A real feeling of achievement that will motivate me to carry on dressmaking!  Bliss!

Saturday, 24 March 2012

Thick and thin blue summer top

I finished this in January 2011 but actually forgot to blog up. Here's the Ravelry link for anyone interested in the yarny details etc: Blue summer top.

Another project that finally made it from 95% to all done:


I tightened up the thread a bit more on the left hand side then the other when I sewed it up.  I will do that as well with a bit of spare thread to even things out on the other side.  When I get round to it...

Closer-up shots of the details:


If you don't have access to Ravelry, the yarn is a thick and thin acrylic by Texere called New Fancy.  It is a good price and I like that it looks quite glossy.

But I felt a bit of a fool for ordering one cone for evalution, liked what I saw and ordered more before knitting up a tension square.  How silly of me!  I would have realised that it is thick and thin - just from looking at it that fact hadn't jumped out at me.  Uh-oh.

I do like the effect of this in the resulting fabric. I just would have preferred this to be a smooth yarn.

I had to do some fancy foot work on the hem and the armhole facings.  Neither of those would lie flat: both kept flicking over.  Acrylic has that annoying characteristic of not blocking well.  The hem was initially only half the height - I picked up stitches and knitted downwards, repeating the same yarnover pattern, finishing with a purled turning ridge row and knit up an inside stocking stitch facing that I sewed up.

The armholes started out with a three stitch wide garter stitch that I worked in while knitting this.  The result was that they kept turning to the inside.  So again I picked up stitches and even though the orientation is different to the garter band, I just knit out a K1 P1 rib.  That seems to do the trick and stay in place where it's needed.

Phew.

I still have some of this yarn left. Ponderations...

Sunday, 24 April 2011

Spontaneous project No 2

Here is the second short-sleeved top that slipped into my queue at the time:


Debbie Bliss Prima - loosely following a Drops pattern but I modified this quite a bit because my gauge was very different.  I also didn't knit the sleeves separately to join into the yoke but did a temporary cast-on for those stitches and knit the sleeves back down.   Which means that the zigzag pattern in the sleeves is actually upside down.  Whoops... Not quite intended, really.

This colour navy is unfortunately a discontinued shade. I was incredibly lucky to get more of this yarn (after I, predictably, ran out) from a wonderful website called A Right Good Yarn, whose customer service was tremendous!

They specialise in some discontinued shades/lines and if you can't find it anywhere else (like me) then give them a go.

And imagine how my jaw literally dropped and hit the floor when I realised that somehow I'd lucked into more of the same dyelot! How lucky is that?


I love the way the zigzag and the garter stitch/eyelet strip works together.  I quite like the reversed effect in the sleeves.  The pattern suggested using just one row of garter stitch to start but I decided to repeath the same pattern from the neckline.  I really like it this way.


My silliness in not quite reading the pattern didn't just show up in my upside down sleeves (I should say top-down sleeves) - it started when I 'forgot' to put the zigzag pattern above the hem!  Oh well.

I must say that this very simple hemline is very much my thing.  A lot of my projects look like this.
 There is just something about it.  My most pronounced pet hate is rolled hems (they make me wince) and I am not keen on garter row hems either, though I much prefer those to the rolled hems that, to my way of thinking, just look as if the knitter hadn't realised that stocking stitch will roll up.


The above is the stage when I really got stuck.  Not even running out of yarn quite dampened my enthusiasm in adapting this pattern to my liking (thinking about it, I may have actually decided not to include the zigzag near the bottom, I don't quite remember now...) - but it took me a while to get from the stage shown above to the finished article.

I was very unsure that I had the "right" amount of stitches.  However many that was supposed to be.  My gauge is totally different than in the instructions.  Realising belatedly that I was meant to knit the sleeves hem upwards and unite into the yoke... oops, that slowed me down to a complete full-stop.  A full stop that incorporated much head-scratching and confusion.

Once I checked and found that the zigzag pattern repeat equals ten stitches, and counting mine found that I had 74 - it finally dawned that I couldn't reduce to 70 stitches but would be better off increasing to 80.  Which worked out really well.

If I had gone for decreasing then the sleeve shape would have been exceedingly weird.  An increase and accompanying flaring out, that I could cope with.

So here it is.

PS: 'Scuse the wrinkles, I forgot to take a picture before first wearing this (too impatient for once I guess!) and a subsequent wash.  At least it shows up that the yarn washes very well (just a normal 30 degree mini cycle, not even the delicate or wool function).  I did dry it flat and turned it over a couple of times.  I suppose I should have given the hem area a quick steam before I took the photo.  Next time.

Monday, 3 January 2011

One more long term project completed!

It is a very pleasant thing when you hope to do something and you accomplish it within a reasonable amount of time.

I mentioned in my last blog post that I would like to do something about two sewing projects that are lying around, crying out to get picked up again, and a green top that needed very little to go from 95% to all done!

And here it is, I've done it!  (It 'only' took ten months):


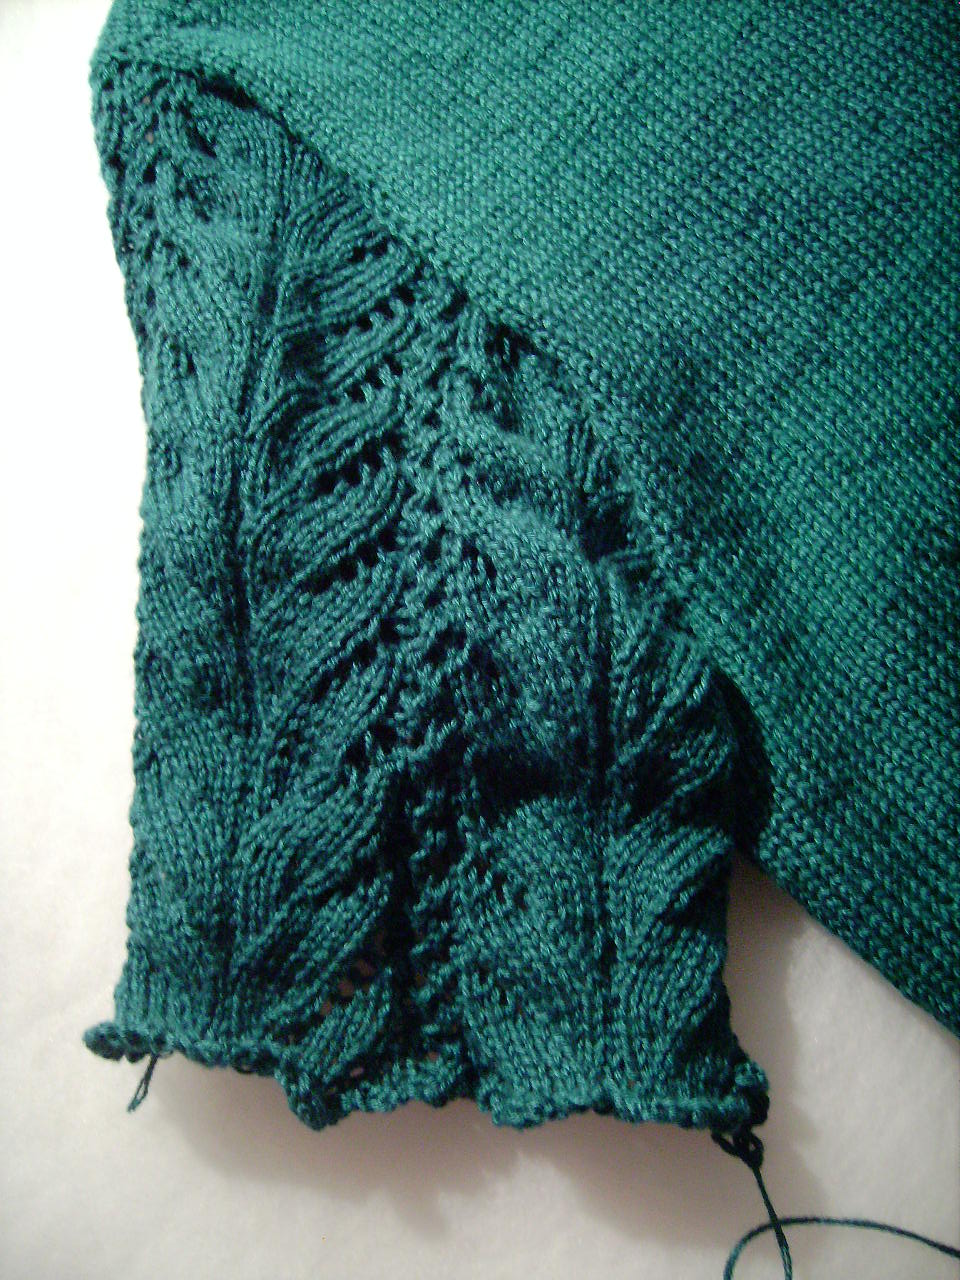
My Green Summer Lace Sleeve Top (Ravelry)

I will post a better picture as soon as the top is finished blocking.  All the other pictures I took are rather fuzzy: I hadn't discovered the macro setting on my photo camera yet (isn't it wonderful that you learn something new every so often?) so no wonder...

My photography skills improved considerably since.

I could have waited for this top to dry but couldn't contain myself. Best strike while the iron is hot.

The details:
YarnDebbie Bliss Prima (half strand)
Needles3.25 mm (I think)
Patternmade up as I went along
Sourcelace patterns from Harmony stitch books


I wrote about my madness in wanting to knit this in a different weight than the yarn provides for (Splitting matters).  I am very pleased with the effect.  The only thing is that I should have paid more attention to the dye lots - I got 100g in a different dye lot and managed to introduce stripes across the top part of the garment.  That was completely unintentional and doesn't look interesting enough for me to get away with pretending that it is part of the design.

My solution to any kind of design problem: do something to make it look as if it was always meant to look this way.  I can't come up with anything in this case though.  I thought of embroidering some wavey lines over the stripes but I think that would make it look worse.  So far the stripes are relatively subtle, this is preferable to any 'solution' I can think of. Best leave things as they are instead of messing this up with an "improvement".

The sleeves were meant to be much more flared - possibly gathered at the top (at the shoulders) and then flaring like wings over the top part of the arm.  They didn't work out like that.  I still only attached them at the top half of the armholes which left the bottom half quite unfinished looking: the edges were a little raw and way too loose too.

I used buttonhole stitch to edge the open armholes, something like this:

buttonhole stitch
Or to show the detail a little better, only closer spaced together than this:

Also called blanket stitch
I tried to get these stitches as even as possible, but it could do with a bit of elastic thread to prevent the armhole curve from being too floppy.

The bind-off edging is my own design.  It is a sort of flared edge with picot details.  As soon as I can put my hand on my notes, I will blog about this.  I made up my own thing here because I wanted to avoid this from becoming too tight and rigid as happens when you bind off in the normal manner.

I do like very plain hems.  The yarn is 80% bamboo and 20% merino, so the hem (long tail cast-on, one row purl stitch and then stockinette), does not roll up quite as much as it could, - but it still does.

A turned ridge hem would have been better. Or I'll need to sew a fabric facing to the inside if the curling up remains a problem.

Monday, 27 December 2010

Icy blue summer cotton top


This was meant to be a quick project to take to knit evenings with me and motor through the stocking stitch.  I also wanted to use up my stash of only 300 grams of this - bought a couple of months ago because I liked the colour.  Never mind that it won't be the season to wear this for a long while yet!

I am very aware that I need to reduce my yarn stash, it has taken on ridiculous proportions, completely out of whack with anything that would be reasonable.  I decided on a 'late year "new year's" resolution' (becauce I never keep the true "new year's" resolutions!) - I want to start a new project by looking for a yarn I fancy using and then finding a project to go with it.  Not the other way round!  That way madness lies because it usually involved me buying new yarn.  This may just be the reason why my stash has grown so excessively.  No more!

This project worked along those 'new intentions' guidelines:  I looked at the yarn and didn't even have to think what sort of project I wanted to do, - the small quantity dictated a smallish project. A sleeveless summer top was just the answer:  I have most of the last ball left so I must have used about 260 grams of this DK cotton.


YarnSchachenmayr nomotta Catania
Needles4 mm
Patternmade up as I went along

For once I did not knit this in the round but did a separate front and back piece because I wanted the stability from side seams to keep this to a better shape.

I used a little bit of a tapered waist, more on the front than the back because I cast on a few stitches less for the back (unintentionally, no idea how that happened).  The only issue I have with this top is that I should have done a couple of short rows across the tummy: the front unfortunately rides up a bit which isn't hugely attractive.

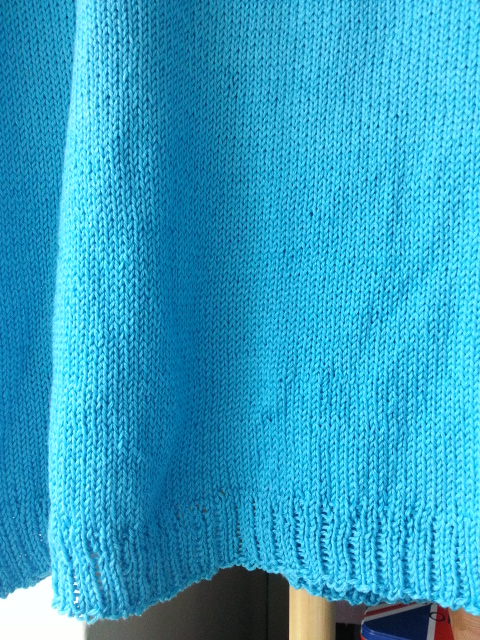
I started with a Purl 2, Knit 1 ribbing but then felt that the reverse side looked better, so before the first stocking stitch row, I turned it over to show the K2, P1 side.  In this cotton DK this type of ribbing makes the purl stitch retreat in the background and leaves the two knit stitches as a very smooth looking surface.  In contrast to stocking stitch this ribbing does not curl up which is exactly what you need for the bottom of a top.  I may use this again, I really like the way this looks!

I wasn't very happy with the raw edges of the neckline and armholes so I attached an applied i-cord made from three stitches.  As per a very handy YouTube clip that I saw, I knit the first stitch of these through the back loop and used a SSK to attach the third stitch to the live stitches I picked up around the edges.

An interesting technical bit is that because I did not pick up enough stitches around the edges, I used my working thread to pick up another stitch every 4-5 stitches.  This means that my working thread loops around the raw edge on the inside and in the process stabilises this raw edge by binding it closer to the i-cord.  I thought that was a very useful, even if completely unintentional, side effect of what started life out as a mistake!  Again, I may use this again - probably more with quite inelastic yarns like cotton and bamboo than with wool.

I like the effect that the applied i-cord has on the edges: it neatens them up no end, and stabilises them very well.  Again this is a technique I will use in future - I may experiment with how 2 stitch or 4 stitch i-cords look.

Friday, 21 May 2010

Utter madness - splitting matters

I really shouldn't be blogging about this top just yet, being nowhere near finished - but I am so excited! There is still so much to be done before it's presentable, but I thought I'd write about my progress so far.


I kept walking past a Debbie Bliss Prima yarn in this gorgeous bright green colour, with a hint of blue! Just my cup of tea. Still, I've got way too much yarn at home, so of course I won't indulge in -yet- another stash-multiplying amount of more yarn! Hm, I lasted all of four visits to the same store, then I just had to buy it after all.

The trouble with holding back until I can't restrain myself from splurging on more yarn is that when I invariably fail (just can't seem to help myself) then it's so much worse. Did I leave it at four balls of this yarn and find a pattern I could use this for?

No, course not. Instead I started off blithely and unconcerned: cast on with the long tail cast-on method, knitted about 4-5 inches, did a bit of a fitted waist every couple of inches until I started to increase for the bust, split into front and back piece, did the shaping for the front and back neckline, and grafted the shoulders together. Unfortunately I ran out of yarn before I reached those shoulders. I knew, deep down, that 200g of yarn just wouldn't cut it, but I didn't want to know. Because it does mean you have to get some more - which involves this splurging out business again.

The store didn't have this colour on the shelf anymore, but a crafts shop in East London had. I did my sums (for once): travelling there by public transport would cost me a little more than if I ordered it online and paid for postage. Saving money! Great. So that was another 100g. Then I ran out again! The shop still didn't have it on the shelf but this time I asked, and lo and behold: some more was retrieved from their stock room. Should have thought of that.

The top was meant to remain sleeveless but have some details at the sides up and around the shoulders. Couldn't decide on what, just garter stitch or something lacey? I kept on going in stockinette stitch before I'd really made my mind up what I wanted to do - it seemed the thing to do.

I grafted the live stitches in Kitchener stitch at the shoulders (note to self: not such a good idea when using inelastic yarn and shoulder decreases: you can see tiny holes) and then wondered what to do next.

A bit of a lace element as a neckband, the top just cried out for it. No problem.

And then I just had to add something equally lacey in place of sleeves - these are sort of wing sleeves, attached at the top but not the bottom so don't go round all the way. They were meant to end in a curved line but the pattern doesn't lend itself to that.


I wanted an edge that's not too straight and tight so I invented a frilly picot edging that I am very happy with. I'll blog about it at some point.

But the really crazy thing about all of this is that I avoided buying the yarn because I wanted to knit in 4 ply and this Prima yarn is more chunky. The thread contains six strands, and I just couldn't help myself: I had to split it into three strands each using my yarn swift and several rolled up bits of newspaper so I could use this in the weight I wanted. I must be completely mad.

Then I topped it - this yarn also comes in a very lovely shade of bright pink (I can never resist a lively shade of fuchsia or magenta!) so I bought that too. And split it.
Then I saw the navy blue on offer online somewhere and bought that too (see what I mean when I said that I go over the top whenever I try to restrain myself? It is just so not a good idea I've decided, ahem) but I haven't split it. I'm thinking it would be nice, just as an experiment, to use it as it comes. Revolutionary!

So there you have it: I've gone completely doolally. Splitting yarn! Honestly, what am I like?

PS: The pink top is coming along rather nicely too! But I think I'll keep that one sleeveless and add perhaps a couple of straps at the top... uses up less yarn...