Monday 28 October 2013

I made a bag


This is tote-ally unexpected (sorry) but I just made a bag!

I had no intention of getting busy on this, it was a sudden impulse and there we are. A great use of a few hours this afternoon.

I want it to carry crafts stuff around with me, so ideally it should have lots of compartments and side pockets (this one hasn't) but I have so much fabric to use up, making this very plain and simple tote is such progress.

I don't know how I am going to use up all of the fabric and wool that I've accummulated. Not in the next ten years plus, or so, I should think.

So I've got plenty more bag projects in me, next time I can add a little side pocket, or compartments or something.  Perhaps reinforce the handles (I forgot. Oh well) and I could use slightly more sturdy fabric. It's just a big floppy.  Everything contributes a bit to learning something.  So worth it.

But all in all I am really pleased with this one.

The fabric lends itself so well to a bag that firmly says: "I'm all about crafts, please carry me!" - so I reckon it was a given.  I still have some of the fabric left to use for patchwork and quilting as intended. And appliqué: some of those little shapes and motifs would be very cute.


I will highly likely hand-sew a running stitch along the outer shell, just a good quarter inch away from the seam with the lining that shows up at the top.

I made this bag up with a pattern off the top of my head. Having had to wait for a hospital appointment earlier in the year I had the chance to look at the tote bag of a really lovely lady who was sitting next to me, and who I got chatting to (I also really liked her style in clothes: individual and cheerful. She was great!).  She didn't mind me picking up her bag and having a good look at it.  I don't think I've ever had a nicer time waiting for an appointment.

I hadn't seen this construction technique before where you insert the handles lower down than the top edge and basically use the lining fabric (or a third fabric) for the top strip.

I was able to assemble the whole thing (with handles sandwiched in between) as one big roll.  The last seam I closed was the bottom seam of the lining and even there I used my machine for the most part: just pulling the edges together until it squashed up the rest of the bag - then I stopped. That left about three inches or so that I sewed shut by hand once I turned the bag inside out through that remaining hole.

Really enjoyed making this.  I like the result and hope to use it lots.

Sunday 27 October 2013

...and in with the new

 
the front


This is only a muslin.  I didn't intend to make this wearable so I used a brown zip that I won't use for anything else and an old fabric in a very odd shade of pink that looks a bit like a messy mix of salmon and tomato in real life.

This is the result of my pattern-drafting, see my earlier blog post Drawn.

I drew up a front and back body using my own measurements, and a clever book on how to do this: René Bergh's 'Make Your Own Patterns'.
 

In my previous post I did say something about the curved hemline I am getting for the back waist.  The pieces for this are drawn a bit longer than the waist (disregarding that the waistline curves up, I just went with the longer measurement), but now I find that the top is not long enough.  The hemline hits my figure at a really odd point so I won't be making this in this length again.

The top was mainly a chance to see how my own measurements work out.  Oddly enough I have to take in the top 5-6 cm of the sideseams, just under the arms, by about a centimetre off front and back, tapering down.  I don't really understand why I keep having to do this, on both my own patterns and bought dressmaking patterns too.  It's as if my upper body is less wide under the bust than the average figure. Unless something else goes into this that I don't know about.

But I really thought this wouldn't happen when I use my very own measurements.  Perhaps the ease given is something I don't need?  Odd.  I might figure this out one day.  Just not yet.

the back

I learned that I like two darts much better than just the one.  And I found marking the darts not quite as horrible to do as I remembered.  I used a Frixion pen to mark them - you erase the lines by applying heat through ironing.  You just have to watch out not to press any area where you still need to see the markings.

I drew the bust dart in to slant up.  Now I wonder what it looks like with a dart from the armhole.  That will be my next project.

I am again really pleased that I was able to finish this.  I will take it along to my next sewing meetup to see if my more experienced friends can give me some tips about the fit.  It seems okay but I think it could be better.

My aim is a pattern that I can use over and over again - I was hoping to get a template out of my template top alterations, but that didn't work out well enough.  This approach is much better - I like the fit of this top lots better.

I just need to add a good 5-10 cms to the length if I want to make another little sleeveless top like this.  This is too short.

Saturday 26 October 2013

Out with the old...

 
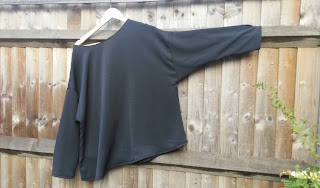
I just finished this top.  Very happy to tick off another old project that had been hanging around way too long.

Sometimes you just can't be bothered to continue with something - particularly when it doesn't appeal all that much any more.


I started with quite a bit of enthusiasm but unfortunately found that I didn't like the fabric all that much.  It feels funny on my skin because it's just a bit too synthetic.  Not sure how much wear I'll get out of this.

I had started this as one of the five projects over five years that I just couldn't finish.  Every single project seemed to have something going wrong and it annihiliated any sewing mojo I had.  That whole period of trying to sew but not getting anywhere was just too frustrating for words.

Initially I thought that perhaps I was trying to do garments that were too difficult for my sewing ability: I picked more and more simple patterns - this one was the second most basic pattern (after the tunic I did in four versions: my grey damask top, the black and white linen tunic, a pink pieced summer top and a black tunic that I haven't blogged about yet because it's not finished) - but there was always a different problem and I let that put me off sewing.

It was very frustrating.  And upsetting.  I am so glad I've got my groove back.  Finishing this off doesn't just tick a WIP off the list (so good to know you don't have to do a thing further on something. You can just put it out of your mind. Yesh) but it also puts an end to this disheartening phase of five WIPs over the five years thing.  The Roses skirt was another one from that time, the last one.  Strangely enough the first one I completed. Yikes, what a relief.

Now for the good points about this top: I did my favourite trick of leaving the sideseams open, closing the shoulder seams - THEN attaching the sleeves flat to the body (so much easier!) and then closing both side seams: the body and the sleeve side seams all in one go.  Strengthening the underarm area with a bit of back and forth stitching is a good idea. 

If you can't get those seams to lie flat because too many seam allowances come together in one spot: just stop sewing (after a bit of back stitching), pull a bit of thread loose, lift your presser foot over the bulky seam allowances and re-starting the seam as close to the spot where you stopped as possible.  It might be a good idea to take the fabric out from under the presser foot and move the seam allowances out of the way and slot it all back in again.

I haven't tried the top on again and I also still need to get a friend to take photos - but I think the pattern is worthy of doing again.  Maybe in a brightly coloured and patterned fabric?  A silk would be really lovely, perhaps a fun cotton would also be possible.  Or something a little softer.  Any fabric that drapes well would probably be better than a cotton.

I think that I will make this again.  It's just got to be a fibre that I don't mind wearing.  And a fabric I love.

Saturday 19 October 2013

Drawn

 
I just drew up a back and front pattern piece according to my own measurements. This time I reduced the front dart (the one going down towards the hemline) by half and drew a second dart into the side seamline. I want to know what it looks like when you use two darts.  My template top relied on just the one dart into the side seam and I had no luck improving the fit of this top so far.  Frustrating.
 
I made up a muslin from my measurements before but I didn't draw the pieces further down than the waist measurement.  Because I get such a funny curve at the back (Yep, I have a swayback. Darn.) I can't quite imagine what it will look like when I just extend the length a bit and disregard the curved waistline.
 
I will presumably have to do a swayback adjustment.


For now I'll just cut this out in an old fabric (why did I ever think that a shade that's an unhappy mix of tomato and salmon would look good on me? What was wrong with me?) - and put it through its paces to give it a go: there's nothing better than doing for learning.
 
I just wish I felt a bit less aggrieved about having to mark darts - it's a job I thoroughly dislike.  That's the reason why I didn't get further on this and why I'm blogging about it rather than sewing...
 
Big sigh.
 
I think that the front piece looks so much longer than the back piece in that first photo because I didn't cut the paper off at the bottom.  On the other hand I'm not really, completely, absolutely sure about that.
 
I did hold the side seams against each other, they're both the same length.  That's got to count for something?


Tuesday 15 October 2013

Roses skirt

I completed another sewing project!  This is what happiness is.

It only took me two years and one month from starting this in September 2011 with the lofty idea of quickly running up a simple skirt... Yeah. Ha-ha.

I posted the completed Roses Skirt project to mysewingcircle.com. See link.

Here it is in all its glory:


The notes on the MySewingCircle site explain my sewing process lots more (if you're a glutton for punishment and want to know all of the itty-bitty details) but suffice to say that this was supposed to be a six panel skirt, but turned into a five panel skirt when I realised that they already fit me (I must have calculated wrong).

I picked a yoke in plain black to calm the print down a bit, plus I didn't have enough fabric for all six panels to begin with. I cut two panels wrong and went back to get more of this fabric.  Thankfully I had started this project soon after my initial fabric purchase and the shop still had quite a bit left. That was lucky.

On the other hand I now have lots of this fabric left in my stash. Oh dear.

I started by sewing the zip to the black yoke because I find that the most difficult part of the process.  I was then told by someone that I was doing this all wrong because you're meant to attach a zip to the lining first, and by yet another person that I was doing this all wrong because I was meant to cut a narrow tube of lining fabric and not the same panels as the outer fabric.  Do you know what?  I think it turned out rather well.  And no, I don't think that my way of sewing this was wrong, I just did this a bit different to what other people would have done.  I am very happy with my result.

What I love most about this skirt is how full the hem feels.  I sewed it up by hand, doing an invisible hem by catching a few threads of the outer fabric every half inch or so.  This gives the bottom edge of the hem such a nice feel of luxurious fullness that you don't get when you machine stitch all the way around.

There is only one thing that is a bit of an obstacle in my getting lots of wear out of this. I've lost weight since I started so this skirt sits quite a bit looser on me than it could do.

I might have to attach belt loops and then wear it with a nice plain black belt.  That could work.

I got really scared of the lining fabric peeking out from under the hem so attaching it to the inner yoke fabric (a self-facing of the same black fabric) was the step that took the longest. I finally got up the courage to start by attached the lining to the yoke and found that it wasn't all that difficult to cut to size off those lining bits that were too long.

There was a bit more work involved in turning up the lining hem, but I got on with that really well so that the whole thing is now finished.  Such a nice feeling to know that I won't have to do any further little bit on this skirt, it is done.  And done means done.  Phew!

Saturday 12 October 2013

FBA! Oh yeah, baby: FBA!

Teehee, forgive the exuberant title, but still.

I just did my first FBA!

Another technique for my sewing and dressmaking toolkit.  Utterly delighted that it worked.  Well, actually, I don't know for certain that it worked but I did hold the edges of all the relevant pieces against each other and I think I made the adjustments where needed.

Yeah.

So, FBA.  What is it?

FBA is short for Full Bust Adjustment.  Commercial patterns are made for women up to B cup size but they don't work great for anyone with a bit more up top.

So a full bust adjustment allows for both more width across the body as well as more length in the other dimension.

Here's a photo of one of my cut up and reassembled pattern piece, the upper front:


The technique involves finding the bust apex (the blue cross a little below the original bust point that looks like a cross hair symbol), cutting to it from the hem parallel to the grain line. Continuing the cut towards the arm hole, I picked the sewing mark to cut towards - but stopping short at the seam allowance.

This last bit then acts as a hinge that keeps the pieces together. [**] Then cut from the side seam towards the bust point but leave a hinge at that point (the apex).

You then pull the lower piece (the one nearer the side seam) away from the other main piece keeping the vertical edges parallel (those running from the apex down to the hem): move them right and left apart from each other by the measure that the pattern piece was too short by.

Put a strip of tissue paper underneath and tape down. (I did this in two steps: I taped one edge onto the tissue strip, then I marked the width where the other edge needs to be, drew a line down and then taped the other edge down up to that drawn line.  It can get quite fiddly)

Now you can then move the dart back to where it was.  The dart is just a bit wider than before to create a more rounded shape and larger cup size over the bust.

I checked the side seam against the front side seam and found that the above dart I drew in the thick blue line was a bit too deep, so I decreased this by a good centimeter in total.

You also need to adjust your piece that's closer to the front centre. Here that wasn't a problem because this piece ended in a point so I didn't strictly need to move the central piece down to come to the same hemline.

I also checked the lower front piece and the contrast fabric piece against all the new seamlines and extended them.

I had a bit of a hairy moment when the lower front did not seem to be wide enough at all.  It turned out that I forgot that both upper front pieces need to be sewn together first and the combined width would therefore lose the two seam allowances of the separate pieces. Makes sense once you think of it. Uh.

All's well that ends well.

Now I just have to cut out some fabric to see if the adjustment really worked. I might go the muslin route before I cut into my expensive wool fabric!

**Correction: I listed two steps in the wrong order before. Apologies, I now corrected this.

Jacket Sew Along - part I


I am taking part in a jacket sew along.  I was going to carry on with my white jacket but it doesn't seem fair to pick a project that is pretty far along when others are only just starting theirs.

On the other hand I am still not that fit to do anything because of an operation I had in the last two weeks and then there's the added problem that I'm stuck in trying to decide what kind of contrast fabric to use on the lapels of said white jacket.  I bought all sorts of materials (both fabrics and also ribbons) but nothing jumped out at me shouting: 'Pick me! I'll look just great!'  I might be expecting too much.


Still, both those reasons made me reconsider.  So I picked Vogue V1264 instead, which I also want to do in black (see the photo right at the top of this post. As if you hadn't guessed).

I had the contrast fabric for a while (Halleluja! Good start) and bought a really nice 100% wool fabric that was priced at the higher end of what I usually spend.  So I'm hoping not to mess up.  Bit nervous about that.

The contrast fabric is a kind of rubbery material that might be best described as faux leather. It is very synthetic but I reckon it would look good for this design.  I may have to use a leather sewing machine needle on it, I still have to try that out.  I just hope that I will be able to sew this material well. I have plenty of fabric to experiment with and I am planning on quite a few sample scraps to have a go with.


I will need to check that the size 18 I cut out is suitable.  I lost some weight recently and as per the measurements given, this is the correct size.  But I I am nowhere near cup size B that I believe most commercial patterns are designed for.  This jacket is supposed to have a loose, relaxed fit but it might not relax as much as fitting me across the bust.  Which would rather obviously be a really awkward problem.  So the next step is to pin the main paper pattern pieces together and try it on.  The plan is to do this today, it is Saturday after all.

Right now, I am about two weeks into the sew along which was set for two months in total. That means that I still have plenty of time, thankfully.

Fingers crossed!
 

Sunday 6 October 2013

Master Coriolis socks


Love the colour of the yarn, loved the pattern in the book.  I was really excited to make these.

The pattern is the Coriolis pathway in the book: 'New Pathways for Sock Knitters: Book One' by Cat Bordhi.

These are toe-up and I hadn't done these “Whirlpool toes” before: you increase every so and so many stitches (in something like six places?) in one row, and then not again for a few rows. The result is a gently rising spiral.  It even turns slightly.  I would have liked to make them symetrical but I increased both the same way.  Something to think about if I use this toe again.

I was fascinated by the spiral that winds its way up the leg.  I just thought that this line would go around the leg for the second time much lower down than it does. I thought I had done something wrong but looking at other examples on Ravelry now I think my spiral just didn't start early enough in the foot section.

I did the cuffs in a K2, P1 ribbing - I love this because it is a little flatter than a K2, P2 ribbing, lies smoother and doesn't look as odd when it gets stretched.

But the problem was that I bound these off a little too tight.  I knew that I didn't want to do them too loosely because then the socks wouldn't stay up, but I didn't realise that the socks would start to feel very uncomfortable when I wear them for any length of time.

I think I will need to re-do the bind-off which will probably make them sit too loosely so they'll slip down.  To prevent that I will then have to weave elastic thread through the inside cuff.

It just feels like it's so much work that I haven't made a start on this yet.  Result: they sit unworn in my sock drawer.  Shame that.

I also made a second knee-high pair of socks that suffer from the same fate. I haven't dared make a third pair yet, so my reaction of this failure has been a bit of a sour grapes attitude: Oh well, I didn't like them that much in the first place.  As if!

I had high hopes with both pairs.  When I make another pair I will have to keep the elastic thread ready for the cuffs.  I'm not going to commit the same error a third time.